How to Download and Burn YouTube Videos to DVD (4 Ways)
- Lafanda
- 23/02/2024

DVD Creator
YouTube provides quite a convenient way for us to stream videos online - on portable devices such as our mobile phones and laptops. But when you need to move those high-quality 1080P, 4K, or even 8K YouTube movies to play on TVs with original quality and no network connection, it is still better for you to burn YouTube video to DVD.
This process typically involves downloading YouTube videos as MP4 or common-format files and then using a YouTube to DVD converter to burn the video files to DVD. In this article, we will explore 4 simple methods to burn YouTube videos to DVD effectively using various YouTube to DVD converters. Let's continue reading for detailed how-to tutorials!
Method 1. Online YouTube downloader + YouTube to DVD Converter (Win&Mac)
We know that to burn videos to DVD, you need help from a DVD burner. But such software only works to burn local video files to DVD for you, meaning that we should download YouTube videos as common videos or music files offline first.
To download YouTube videos offline, there are actually many online YouTube downloaders available to help. Take SSYouTube as an example. Such an online downloader needs no cost to process YouTube video downloads even without software installation required. It will only ask you to paste a video URL, then the downloader will convert the video and provide different download options (with optional quality and formats) to let you save it as a common media file offline.
1. Download YouTube Videos as Local Files
Step 1. Go to YouTube and find the YouTube video you want to burn YouTube video to DVD. Then copy its URL.
Step 2. Paste the YouTube video URL to the search bar on SSYouTube and click the "Download" button to convert it.

Step 3. When the output options are provided, choose the format and quality you need and click "Download" to save the YouTube video as a common video file.
2. Create A DVD from YouTube Videos
When you get the downloaded YouTube videos, now you can use a YouTube to DVD converter to burn MP4 videos to DVD immediately. To process this, VideoByte DVD Creator offers professional help, which can keep lossless quality and help users burn YouTube videos of 720P, 1070P, 4K, 8K, and even 3D videos saved in different formats to the most DVD/Blu-ray disc types or even ISO images easily.
Also providing an in-built video editor, this best YouTube to DVD converter software allows you to edit YouTube videos like their brightness, saturation, contrast, hue, etc, or import as well as add audio tracks and subtitles for them before burning. It also provides a menu creator to let you customize the DVD menu and help you skip to the wanted part of the video! This powerful YouTube to DVD converter can help you easily rip YouTube videos to a DVD!
VideoByte DVD Creator: Burn YouTube Video to DVD with Best Quality
- Burns YouTube video to DVD discs of all popular types with high quality
- Supports burning YouTube videos downloaded in different formats such as MOV, AVI, MP4, and more to DVD and in high quality losslessly
- Offers an in-built editor to adjust YouTube videos before burning
- Provides a menu creator to let you stream the wanted part of the video without any hassle
- Supports rapid speed to burn YouTube videos to DVD without wasting much of your time
Now, you can also learn how to burn a YouTube video to a DVD disc using VideoByte DVD Creator just by several easy steps.
Step 1. Import YouTube video
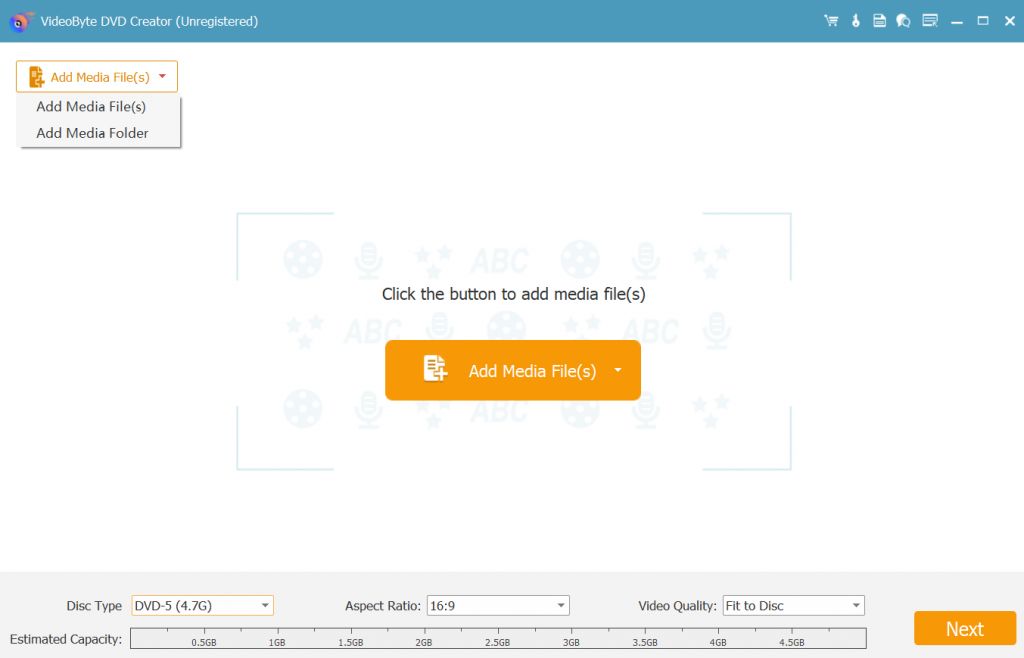
When you've downloaded YouTube videos to MP4 or other digital formats, insert a blank DVD into your computer. Then, you can download and launch VideoByte DVD Creator. Click the "Add Media Files" icon in the middle interface upper-left corner to import YouTube videos to the program.
Step 2. Edit YouTube video
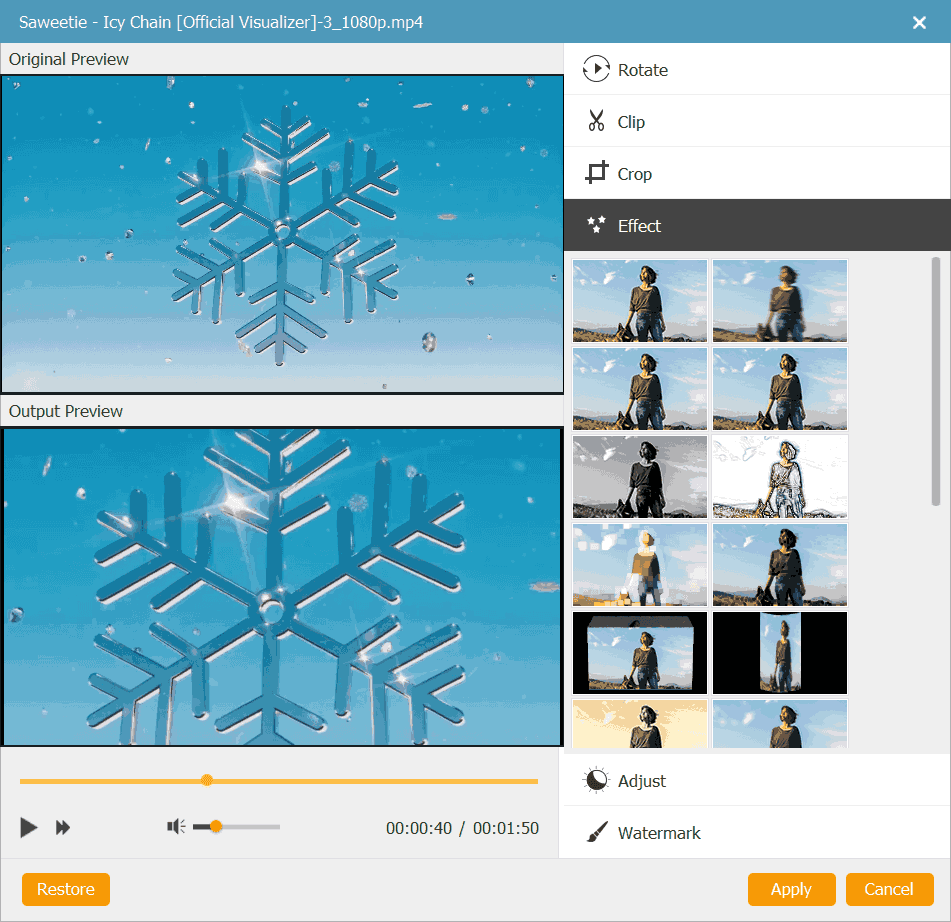
If you would like to add some special effects to videos, find a "Magic Stick" icon at the right side of each video, then click on it to edit the video including rotating, cropping, trimming, adjusting the brightness, adding filter and watermark. If you aren't satisfied with the edited video, you can click the "Restore" icon on the bottom to re-edit. After finishing editing, click the "Apply" icon on the bottom.
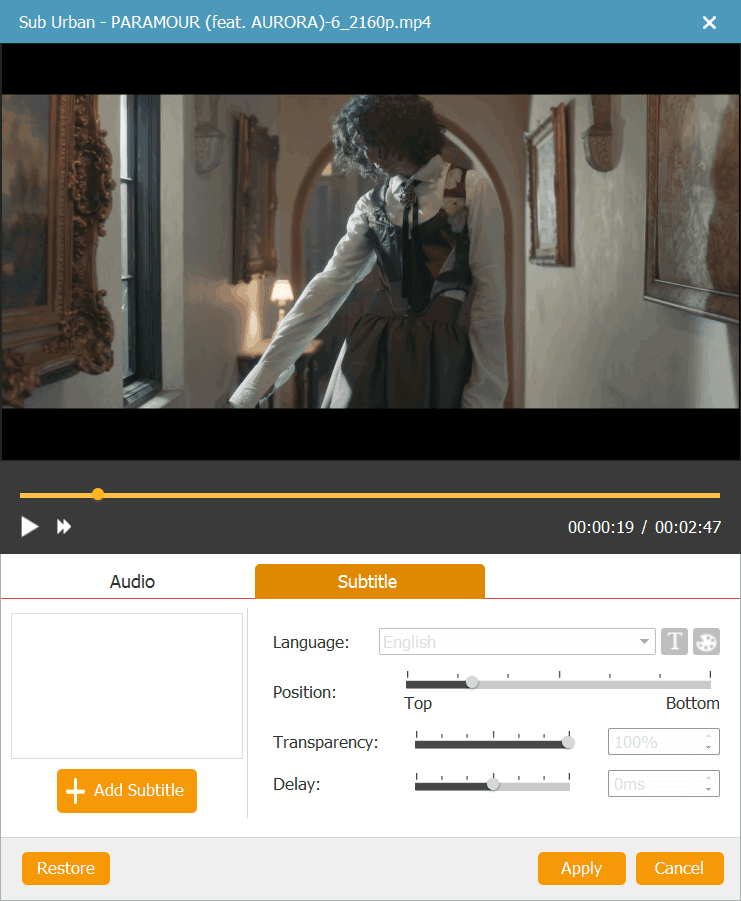
Besides, you can change the basic parameters of a DVD disc such as Disc type, aspect ratio, and video quality by selecting the parameters at the bottom of the main interface and clicking the "subtitles" option next to "Magic Stick" to add and enter subtitles if you like.
Step 3. Customize DVD Menu for YouTube Videos
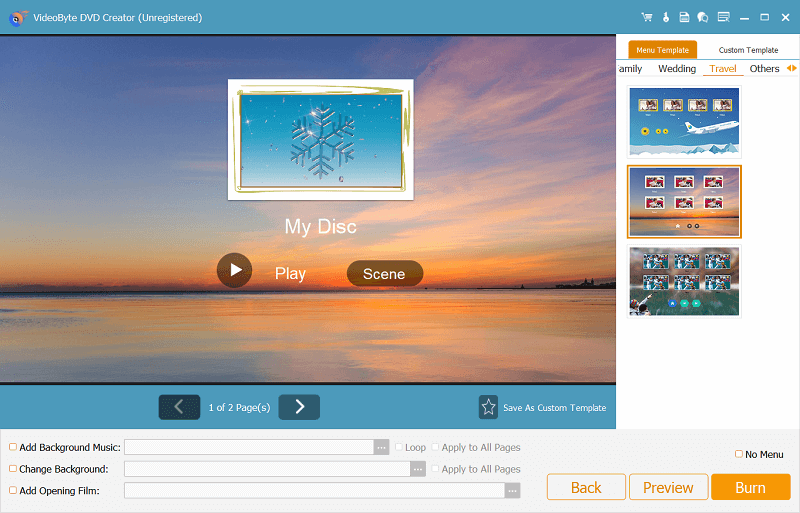
Press the "Next" icon at the bottom right corner to edit your DVD menu. On the left side, you can see menu templates in various styles such as holiday, wedding, family, travel, and so on, just select one as your menu. You can also change the title subject as you like. In addition, you can add background music & opening film to your video and change the background at the bottom.
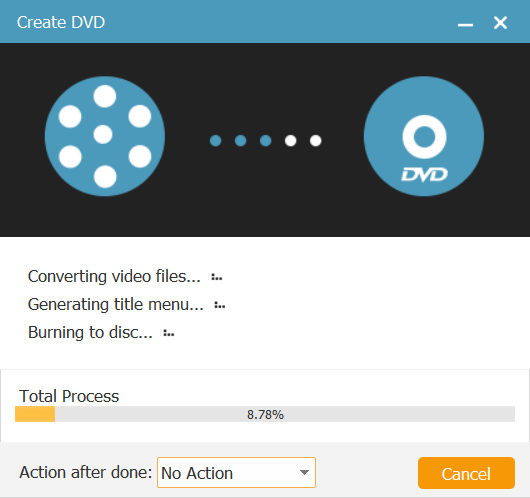
Step 4. Start burning YouTube Video to DVD
Make sure you've inserted a blank DVD disc into DVD-ROM before starting burning, then click on the "Next" icon at the bottom right corner. You can save the output folder in a DVD or DVD ISO file. Besides, you can set the TV standard and playback mode as you like. When all of these are settled, you can click "Start" in the lower right corner to burn YouTube video to DVD.
Method 2. Third-party YouTube Downloader + YouTube to DVD Converter (Win&Mac)
As mentioned, downloading YouTube videos offline can be the first step to burn YouTube video to DVD. However, many of you may discover that online YouTube downloaders can't keep the original quality of the videos, making the video playback on larger screens after burning to DVD less enjoyable.
So if you want to download YouTube videos without any quality loss but keep them in original quality such as 1080P, 4K, and even 8K as the sources, VideoHunter YouTube Downloader is the best tool to help. The software offers an efficient download service, which even allows you to batch convert and download YouTube playlists as well as channels at once. More importantly, it won't compress the video quality but just keep them in their original settings for you.
Here you can see how to download YouTube videos using VideoHunter YouTube Downloader to prepare the videos to burn YouTube video to DVD later using VideoByte DVD Creator.
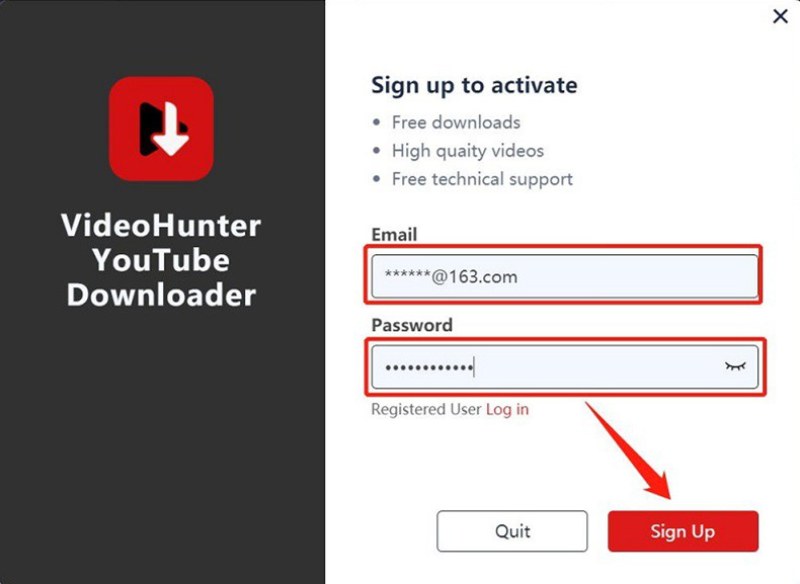
Step 1. After installing VideoHunter YouTube Downloader on your computer, open the software and create a VideoHunter account to sign in.
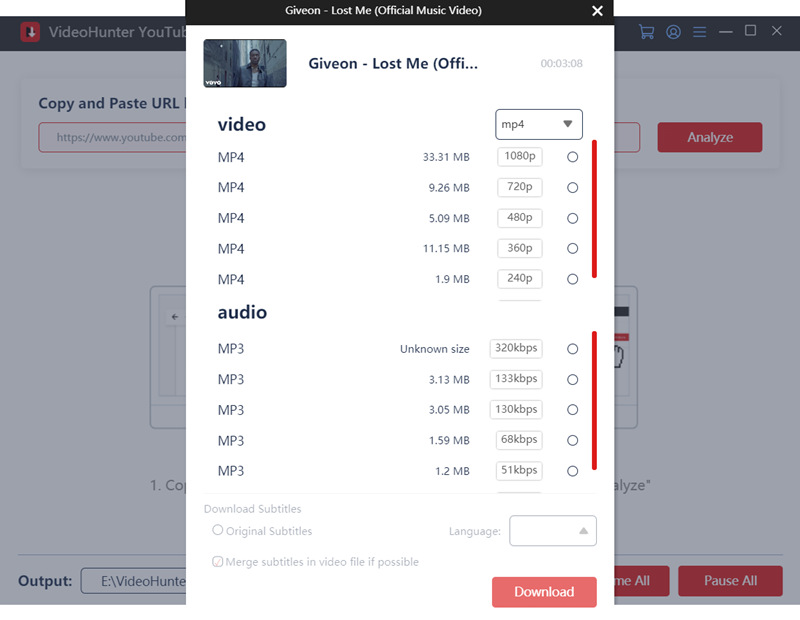
Step 2. Now, you can go to YouTube and copy the URL of the YouTube video or playlist you want to download and burn onto a DVD disc. Paste the URL to VideoHunter YouTube Downloader and click "Analyze" to convert it immediately.
Step 3. When the output choosing window pops up, just select the videos (if you are converting a YouTube playlist) and also the format as well as quality for them. Click "Download" and VideoHunter YouTube Downloader will download them as common video files for you at a quick speed.
Once getting the downloaded YouTube videos, you only need to open YouTube to DVD burner - VideoByte DVD Creator. Simply add YouTube videos to the program and then, you can easily follow the on-screen instructions to finish the burning process. Let's check for a more detailed tutorial in this video.
Method 3. Online YouTube downloader + Windows Media Player (Windows)
For Windows users, a free and convenient way to burn YouTube video to DVD can be using Windows Media Player.
Many of you would neglect its burning function because this software is a default media player embedded in Windows systems. But actually, when you get YouTube videos downloaded as common video files, Windows Media Player can help you easily burn them to DVD even without installing third-party YouTube to DVD converters anymore! Moreover, it also serves as a reliable solution to put a YouTube video on a CD, helping you organize music collections.
Now, you can also read the tutorial of Windows Media Player and see how to burn video from YouTube to DVD/CD with the help of this default media player on Windows.
Step 1. Download YouTube videos in MP4, MP3, or other plain formats using an online YouTube downloader. Then, open Windows Media Player on your Windows computer and also insert a blank DVD to prepare. Once the download process is done, drag and import YouTube videos to the interface of the software as well.
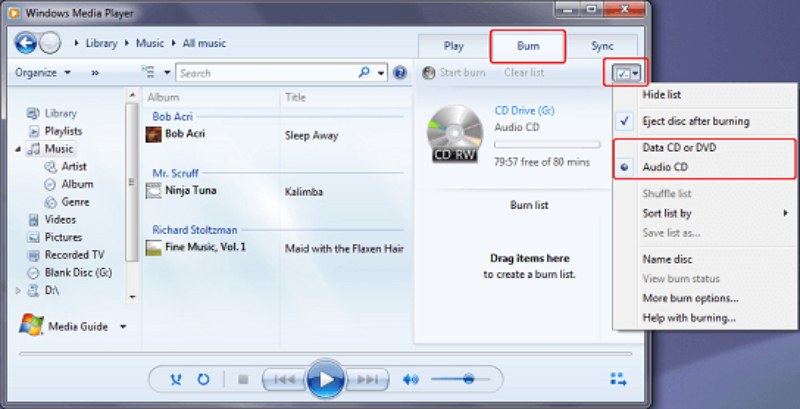
Step 2. On the right side of the menu bar, you will see the "Burn" option. To burn YouTube a video to disc, you need to select this function and add the videos to this "Section" from your Windows Media Player library.
Step 3. When the videos are added now, click the "Setting" icon in the burning list and choose "Data CD or DVD" as the burning option. Additionally, to burn a YouTube video to CD, select "Audio CD" in this step.
Step 4. Finally, just click the "Start Burn" button and Windows Media Player will help burn YouTube videos to DVD/CD discs immediately.
NOTE.
However, it should be noted that this method may not always be successful, as there may be situations where the DVD cannot be read, or Windows Media Player may pop up an error message saying it failed. To ensure a more stable and reliable YouTube video to CD/ DVD burning experience, it is recommended to use the best DVD Creator Software - VideoByte DVD Creator.
Method 4. Online YouTube downloader + Burn App (Mac)
Like Windows Media Player for Windows, Mac users can also find a free in-built app to directly burn downloaded YouTube videos to DVD with just several clicks, which is Burn App. This software also won't ask you to install any other bundled apps or extensions and doesn't need to pay for any cost at all. You only need to get the YouTube videos downloaded as common media files offline using any online YouTube downloader, and then Burn App and help you burn YouTube video to DVD easily. The following are the steps you can follow.
Step 1. To begin with, download YouTube videos for offline playback by using an online YouTube downloader. For multiple YouTube video conversions, it is advisable to use desktop software like VideoHunter YouTube Downloader. Firstly, you should insert a blank DVD disc into your Mac computer.
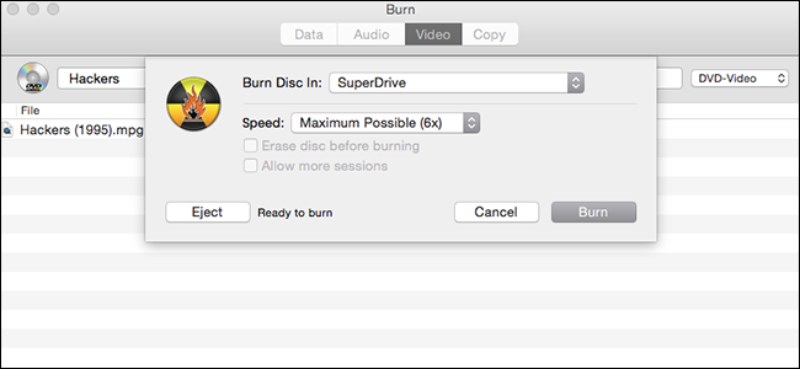
Step 2. Open Burn App and select the "Video" tab. By choosing "DVD-Video" mode and typing the disc name, you can choose your inserted blank DVD to get ready to burn YouTube video to DVD.
Tip: If the DVD disc is not blanked or has been erased, you can't select it to burn YouTube videos.
Step 3. Now, you can directly drag the downloaded YouTube videos to Burn App. It is noted that Burn App only supports MPG format, so just make sure the YouTube videos you downloaded just now are saved in this format.
Step 4. After importing all YouTube videos, simply click the "Burn" button and Burn App will help burn YouTube video to DVD for you.
NOTE.
For YouTube videos saved in non-MPG format, it is recommended to make use of the best DVD burning software like VideoByte DVD Creator to obtain a more flexible performance.
4 Methods: Which is the Right for You
The above four methods can effectively help you burn YouTube videos to DVD. If you still can't decide which method to use, you can read the following overview to learn more and choose the method that suits you best.
- Method 1. Online YouTube Downloader + YouTube to DVD Converter (Win&Mac)
Online tools can experience unstable services or become unavailable at any time. If SSYouTube is no longer working, you can also use other online tools or desktop YouTube downloaders to download YouTube videos to your local folder.
- Method 2. Third-party YouTube Downloader + YouTube to DVD Converter (Win&Mac) (Recommended)
Compared with other methods, the collaboration of VideoHunter YouTube Downloader and VideoByte DVD Creator can provide a stable and fast YouTube video to DVD burning service. Not only that, this method works for both Windows and Mac users.
- Method 3. Online YouTube Downloader + Windows Media Player (Windows)
While Windows Media Player offers a free DVD-burning option, it's important to note that it's not specifically designed for this purpose. Compared to dedicated YouTube to DVD burners, you might encounter higher failure rates and slower speeds.
- Method 4. Online YouTube Downloader + Burn App (Mac)
This free solution is suitable for Mac users, but the Burn App only supports MPG format videos. If your YouTube videos are not within its supported range, this method may not be suitable for you.
FAQs about Converting YouTube to DVD
Is it legal to burn YouTube videos to DVD?
If you are downloading copyright-free videos from YouTube and burn them to DVDs for personal use, it is absolutely legal. But when you download the resources without gaining permission from the original authors and use them for any commercial purposes, which leads to the actual loss of the content creators, you will be accused of breaking the copyright laws.
How can I download a video to a DVD?
As mentioned, you will need to use an online video downloader to save the videos you like as common media files first, and then use a professional YouTube to DVD converter like VideoByte DVD Creator to burn them onto the disc. At present, there are no direct ways available for you to download a video to a DVD from streaming platforms.
In Conclusion
This article explores four feasible methods to burn YouTube videos to DVD discs. The advisable option is to use VideoByte DVD Creator, a professional YouTube to DVD burner that can not only burn YouTube videos to DVD but also provides various advanced features, such as video editing, custom DVD menus, and fast burning speeds.
If you prefer a free YouTube to DVD converter, Windows Media Player and Burn App may be options you consider. However, their burning process will be longer with higher failure rates. Therefore, if you want a stable and efficient solution, VideoBye DVD Creator is recommended.
Hot Articles