How to Create Personalized DVDs on Mac Effortlessly

DVD Creator
Many people would like to transfer the memorable videos to DVD as a collection for keeping permanently, such as the wedding party, business proposals, and so forth. For the demands, Mac used to provide the built-in DVD creator, iDVD, for burning DVD without extra assistance. And burning DVD here means to write contents such as video to the DVD or other recordable disc. Nevertheless, since the system update after Mac OS X 10.7 Lion, the DVD burning feature on Mac didn't exist anymore. Therefore, this tutorial will walk you through another professional and powerful way to create and burn personalized DVD on Mac. Please keep scrolling and read.
Part 1. Best iDVD Replacement for Mac: VideoByte DVD Creator
When more DVD creators are providing convenient service to burn videos to DVD, we still wish to get the best iDVD replacement for Mac. But how do we define "Best"?
Concluded from several aspects, the best DVD burning software ought to contain the following qualifications:
- Popular digital formats supported to input;
- Effortless manipulation to burn DVD;
- Common disc types supported;
- Fast DVD burning speed;
- Extra toolkit for creating DVD menu.
Based on these requirements, VideoByte DVD Creator is selected for recommendation. This brilliant DVD burning software provides outstanding service to easily burn all popular videos (including 3D and high-definition videos) to DVD and Blu-ray discs/folder/ISO in an easy process. Equipped with the built-in editor, people are allowed to create personalized DVD menus with the preset templates and edit videos for enhancing their visual effects. VideoByte DVD Creator will be a good partner for you to burn DVD on Mac replacing iDVD.
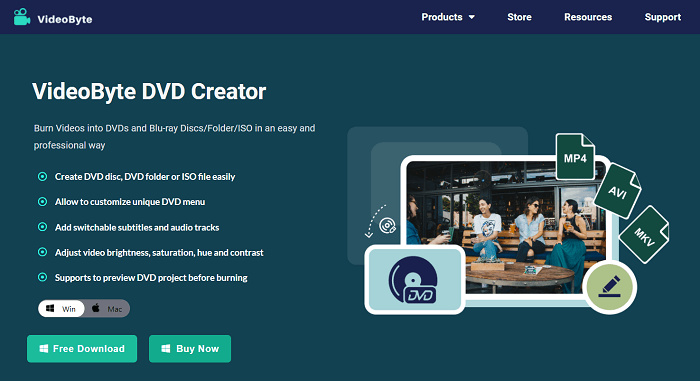
The sparkling features all make VideoByte DVD Creator a popular option for selecting to burn DVD. The following criteria are the key ones:
- It is not only compatible to burn videos to DVD but also supports to burn Blu-ray disc/folder/ISO.
- All popular video formats, 3D video, and 4K videos are all supported to burn.
- Common disc types such as DVD-5, DVD-9, BD-25 and BD-50 are available.
- The customized menu editing feature is supported - people are able to apply the fixed menu templates or upload background image/music to decorate the videos before burning.
- The built-in video editor allows people to rotate, clip, crop the unwanted parts, add effects/watermark. Meanwhile, you can enhance your video such as brightness, saturation, hue, and contrast effortlessly.
- It also supports the lifetime software update and responsive customer support to ensure the best DVD burning experience using the program.
As a professional DVD creator, you may consider it a program that is difficult to manipulate. But in fact, VideoByte DVD Creator is quite simple to utilize. The following part will guide you how to burn a playable DVD on Mac.
Part 2. How to Create a DVD without iDVD
The easy manipulation provided by VideoByte DVD Creator is contributed by its rational interface design. To know how to create DVDs on Mac with the program in effortless procedures, follow this guide and you will see.
Step 1. Install and Launch VideoByte DVD Creator
First, please install VideoByte DVD Creator on your computer. It supports Windows and Mac, and also provides free trial for you to experience the full features. After the installation, just launch the program.
Step 2. Import Videos to VideoByte DVD Creator
After entering the main interface of VideoByte DVD Creator, tap the Add Files button and you can browse your computer for selecting and importing videos to the program. Because VideoByte DVD Creator supports batch burning, you can import a batch of videos at once.
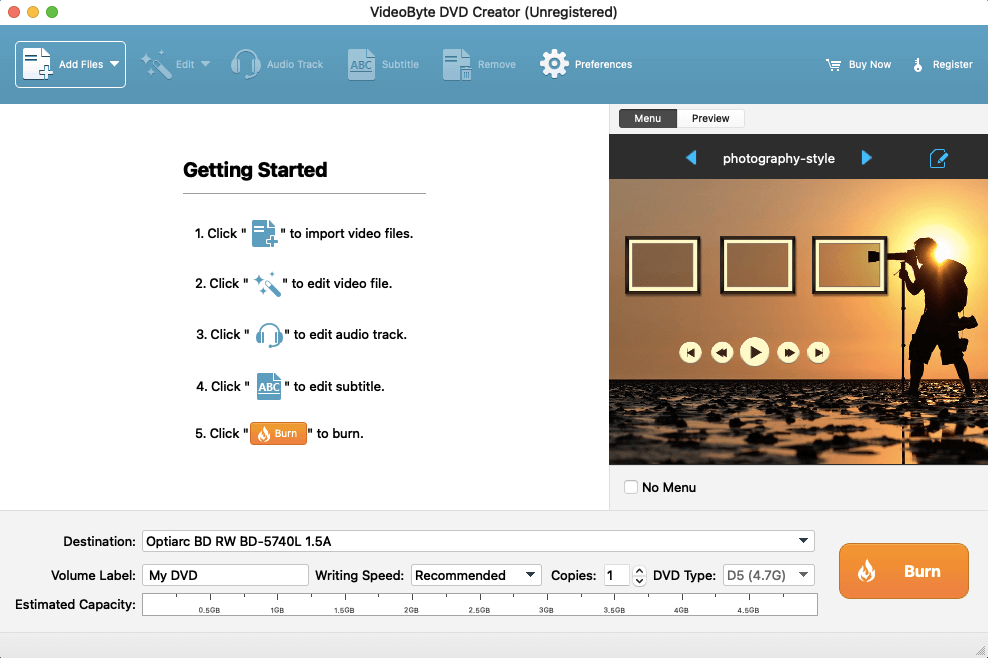
Step 3. Edit Videos and Customize DVD Menu
VideoByte DVD Creator provides optional editing tools for customizing the videos and DVD before running into the burning process. If you need, see how it functions to help manage different editing purposes.
- Edit Videos
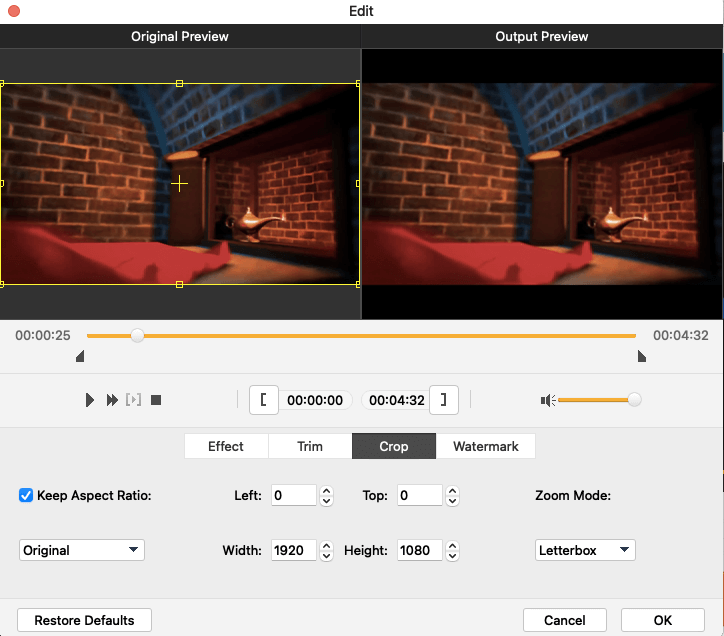
By tapping the Edit option, you will be turned to the editing window. Here you can adjust the video with the rotating, clipping, cropping functions, or enhance it with the provided effects, watermark editing, and so forth.
Add Subtitle and Audio Track
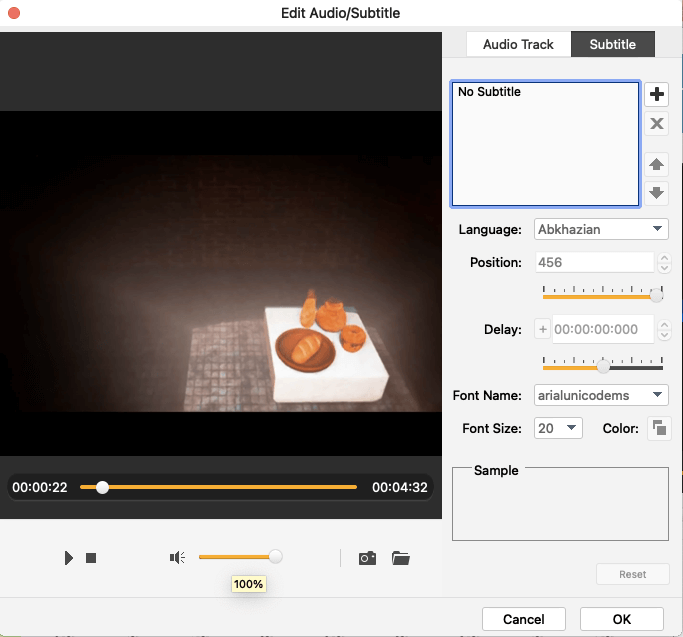
You can go to add subtitle or audio track to the video by clicking on the Audio Track or Add Subtitle button. After importing the audio track or subtitle, you can also adjust the parameters or subtitle settings in your preferences.
Step 4. Customize DVD Menu
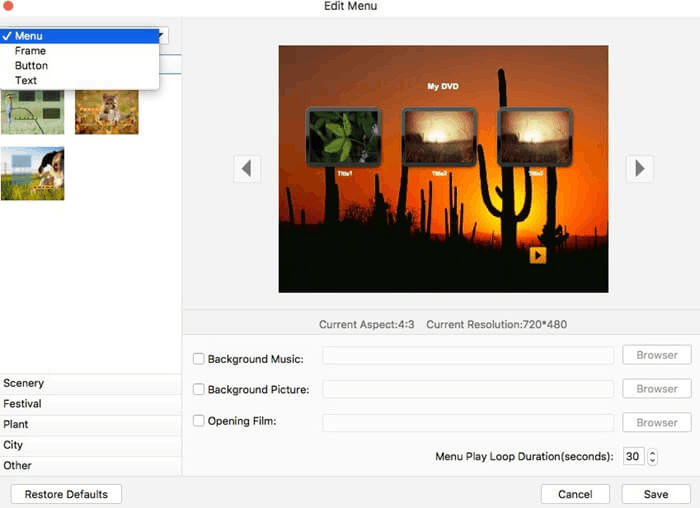
Now, go to Menu and you will be provided with lots of menu templates for directly using. You are also allowed to add background music as well as photos by uploading your personal files.
Step 5. Select Output Folder and Start Burning
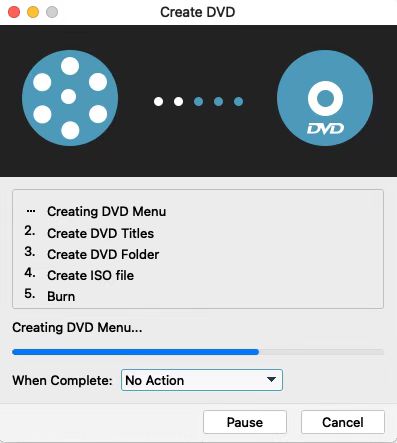
Subsequently, go to Preferences on the top right corner and you can customize the output parameters and folder for burning the videos. After the settings, confirm to Burn videos and wait for the burning process to complete.
Is it easy to get the videos burned to DVD with VideoByte DVD Creator? The convenient service brought by the program can help burn videos to DVD professionally in easy manipulation. Furthermore, its fast-burning speed and high-quality output formats always ensure a hassle-free burning experience. If you're fretting about in lack of a competent DVD maker on Mac, try it for getting the videos easily burned now! Enjoy!
Hot Articles
