How to Use VideoByte DVD Ripper
Contents
Install and Register
VideoByte DVD Ripper for Windows lauched a new version which has big improvement in the aspect of the performance. And, the new version for Mac is under development.
So, the interface for Windows and Mac is different. You can switch to the user guide for Mac from the button above.
First, you can download the free trial version to test the VideoByte DVD Ripper. But, the trial version has the limitations below:
- You can only convert 5 minutes of each DVD disc or Blu-ray disc.
- To rip DVD disc to the folder, you can only rip 5 discs within 30 days.
- To rip DVD disc to ISO file, you can only rip 5 discs within 30 days.
- You can use the "Media Metadata Editor", "Video Compressor", and "GIF Maker" for 5 files respectively.
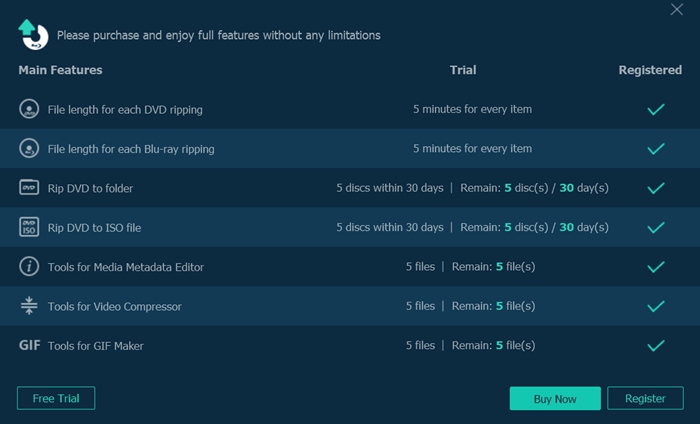
If you appreciate VideoByte DVD Ripper, you can get the full version by clicking the "Buy Now" button or go to the official store.
Once you finished the order, a email which include the registration code will be sent to your email box. Now click the "Register" button to open the "Register" window > then copy and paste the registration code and fill in your email address to the blank bar. Finally, click the "Activate" button to register the VideoByte DVD Ripper.
Rip DVD Movie Disc
Note: The new version of VideoByte DVD Ripper for Windows not only can rip DVD disc to digital formats, but also can rip DVD disc to ISO image file or DVD folder.
Step 1. Load DVD Disc
(1) To load DVD disc, you need to connect the drive to the computer and insert the DVD disc to the dirve first. Then, click on the "Load DVD" button and select the drive which include the DVD movie disc.
(2) To load DVD ISO image file or DVD folder, you can click the drop-down menu of "Load DVD" button or directly drag the DVD ISO file/folder to the main interface.
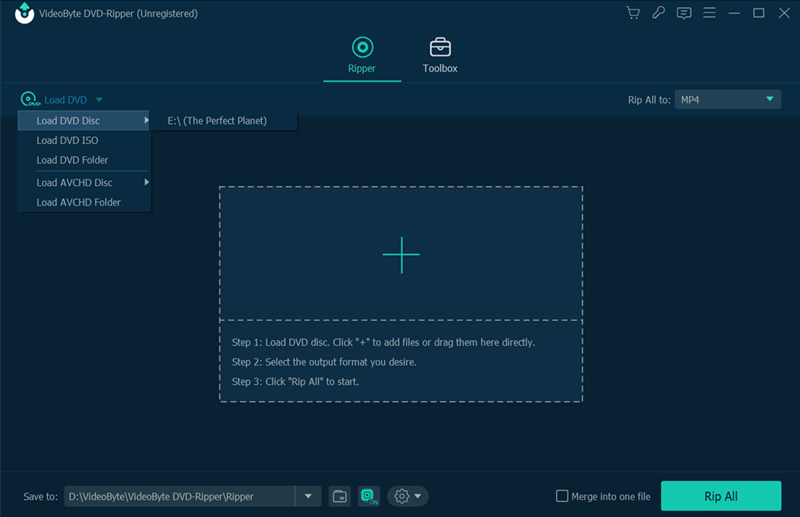
Step 2. Choose the DVD Content You Want to Rip
After loading the DVD disc, this program will automatically detect the main movie for you. If you also want to rip other content, you can open the "Full Title List" and select other titles from the pop-up window.
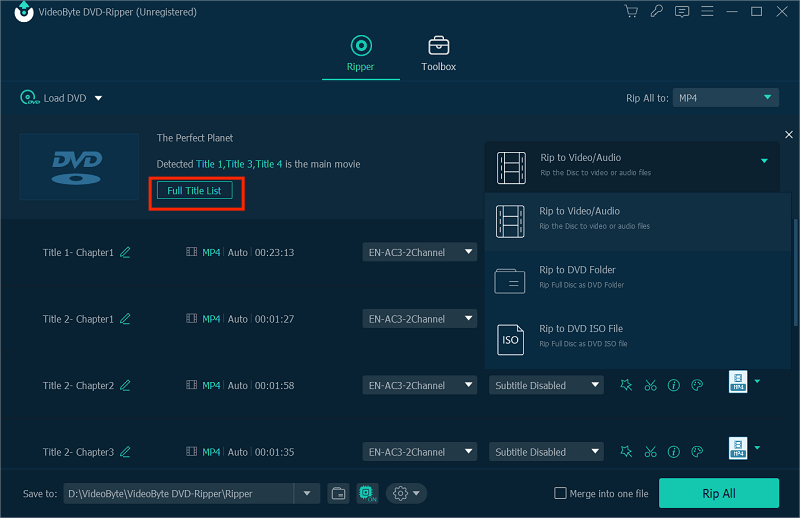
Step 3. Select the Output Format
(1) If you want to rip DVD movie to ISO image file or DVD folder, you can click on the area of "Rip DVD to Video/Audio" > select "Rip to DVD Folder" or "Rip to ISO File".
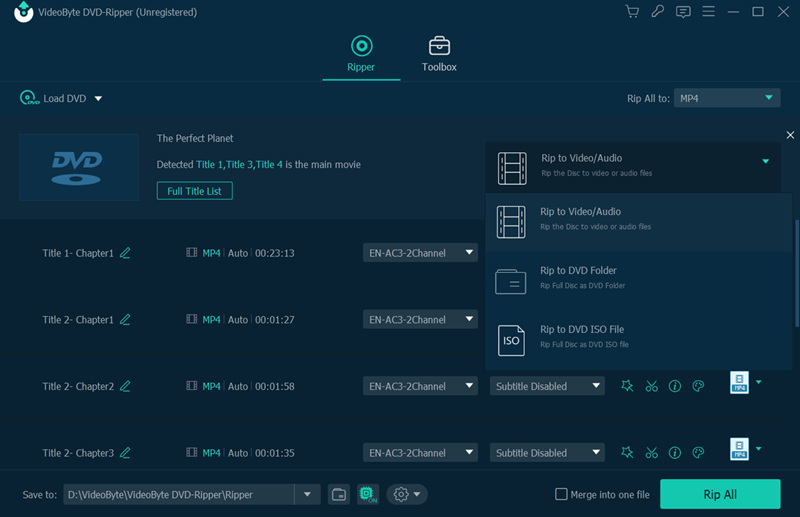
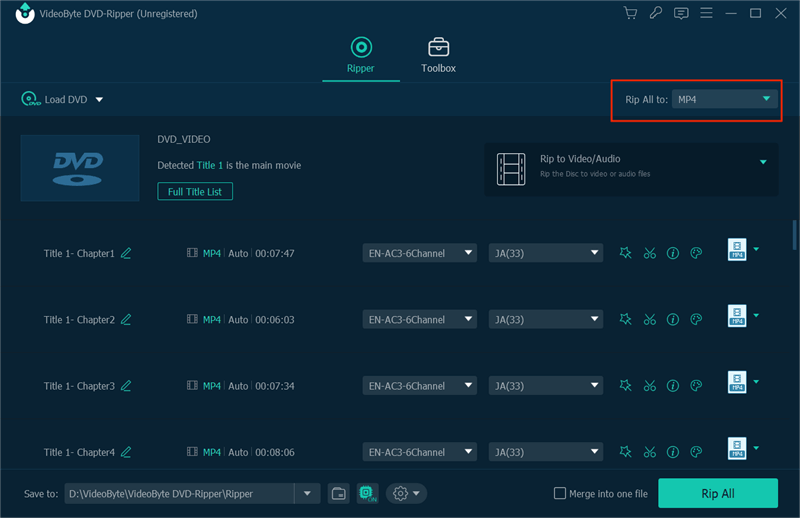
(2) If you want to rip DVD movie to digital video/audio format, you can click on the "Rip All to" button and select your desired output format from the pop-up list.
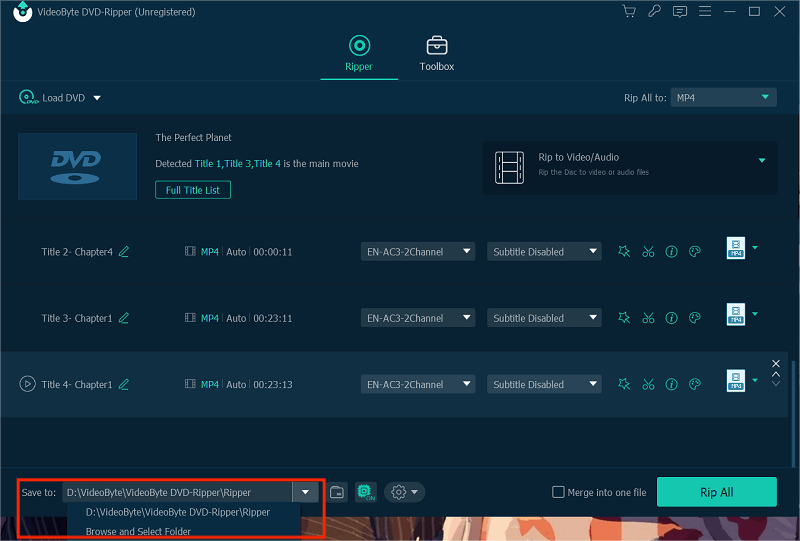
Step 4. Choose the Destination Folder
Go to the "Save to" section, here you can change the destination folder where save the ripped DVD movies.
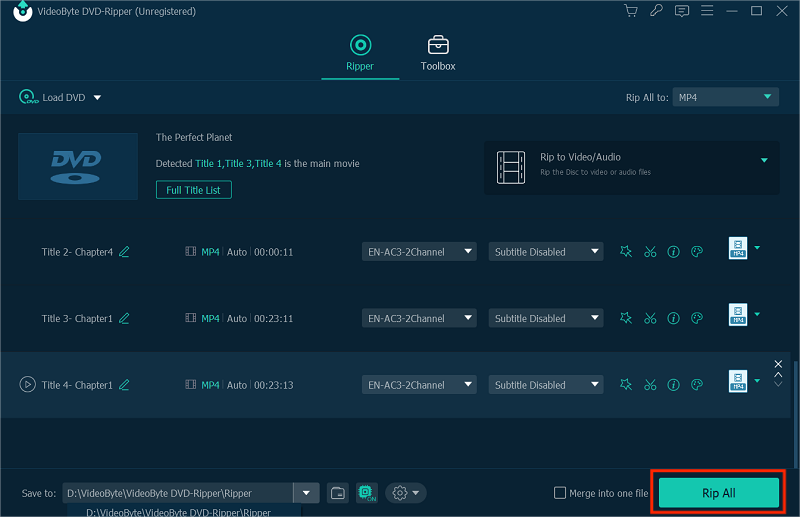
Step 5. Rip DVD Movie Disc
Now click on the "Rip All" button and you can start ripping your DVD movie to MP4, MKV, MOV, MP3, or the DVD folder and ISO image file.
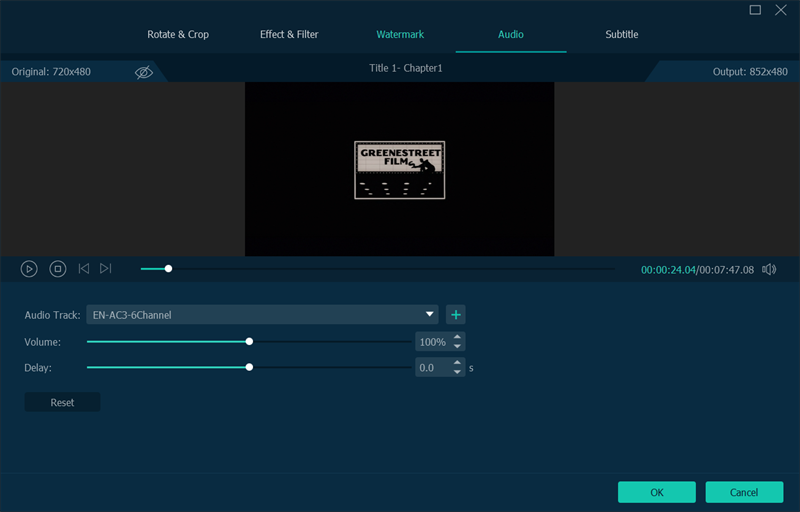
Select Audio Tracks/Subtitles
Step 1. Choose the Audio Track/Subtitle
Generally, VideoByte DVD Ripper will choose all of the audio tracks and subtitles to rip. But if you don't need to keep all of the audio tracks or subtitles, you can select them according to your need.
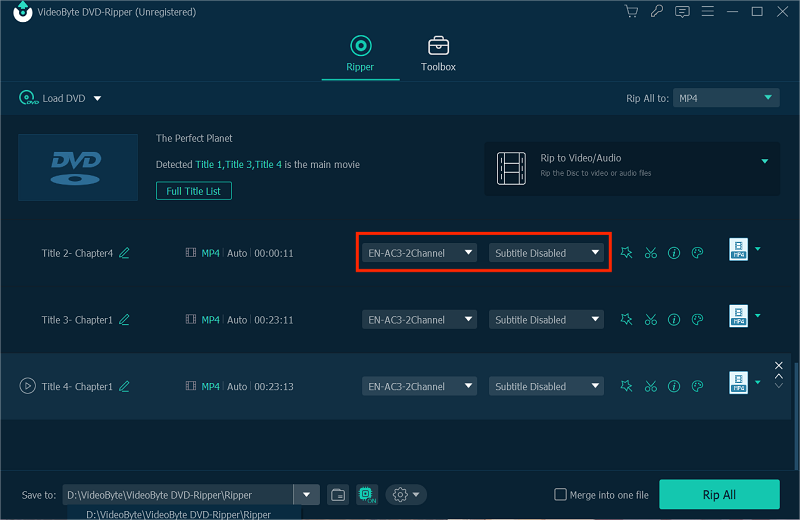
Step 2. Add Audio Tracks/Subtitles
In addition, you can also add external audio track and subtitle into the DVD movie by clicking the "+" icon.