How to Use VideoByte DVD Creator
Contents
Trial Version vs Full Version
VideoByte DVD Creator is capable of burning any video to DVD including home-made movies, videos downloaded from YouTube/Vimeo and videos taken by mobile phone. It supports nearly all video formats including AVI, MPEG, 3GP, MP4, VOB, FLV, M2TS, MTS, MOV, QT, etc. In this guide, I'll show you how to burn video to DVD so that you can create your own DVD for playback on DVD player or backup.
For trial version of VideoByte DVD Creator
- It will add watermarks to the created DVD.
- You can only use the trial version for 10 days.
For full version of VideoByte DVD Creator
- There will be no limitation on how many times you can use the program or for how long you can use it.
- You can create DVDs without watermarks.
- You will get free technical support and free update for lifetime.
Guide: How to register VideoByte DVD Creator on PC
Step 1. Free download the program from our official website. And install the program on your computer.
Step 2. Launch the program and you will see an "Unregistered" window pop up. Enter your licensed email and code and press "Register" button.
Note: If you need help about registering or using this software, please contact our support team to get help.

Burn Video to DVD
Step 1. Launch VideoByte DVD Creator on PC
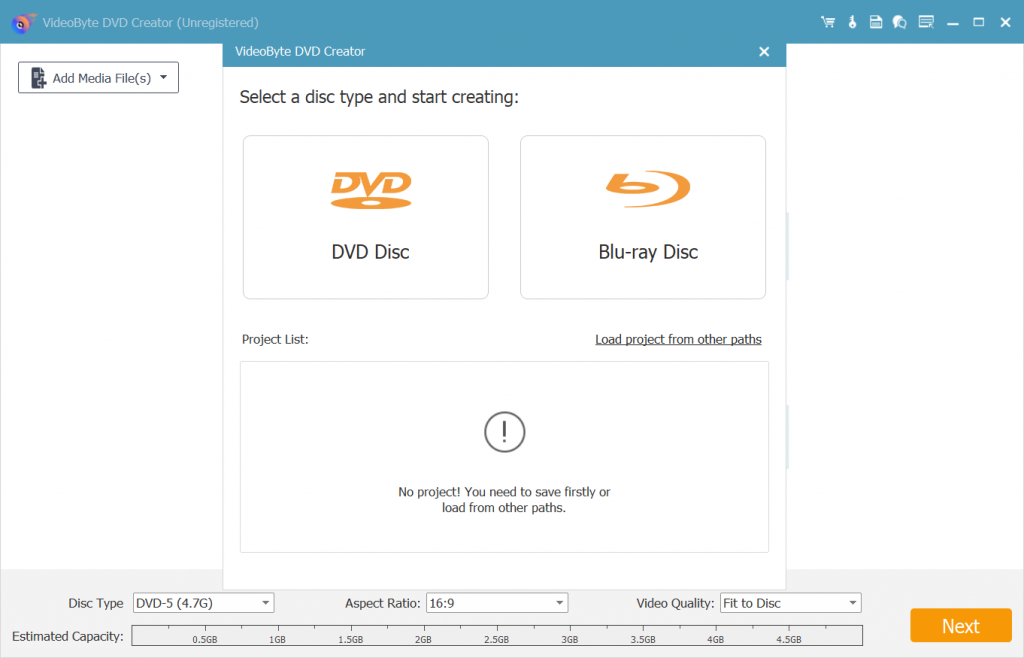
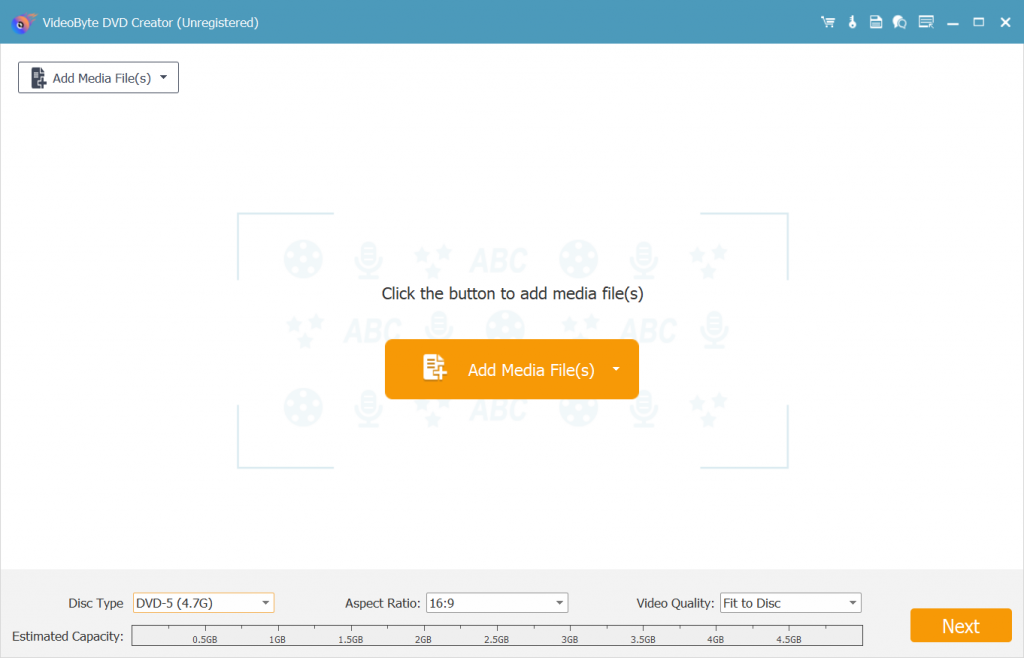
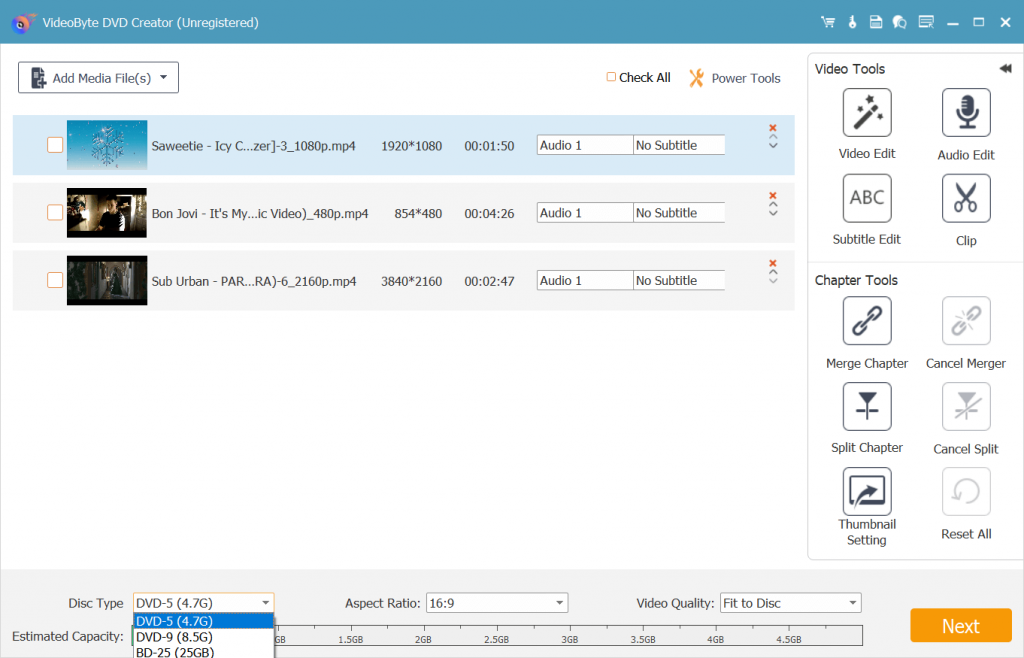
Launch the program on your computer and then you will see an interface as below. Choose DVD disc type first.
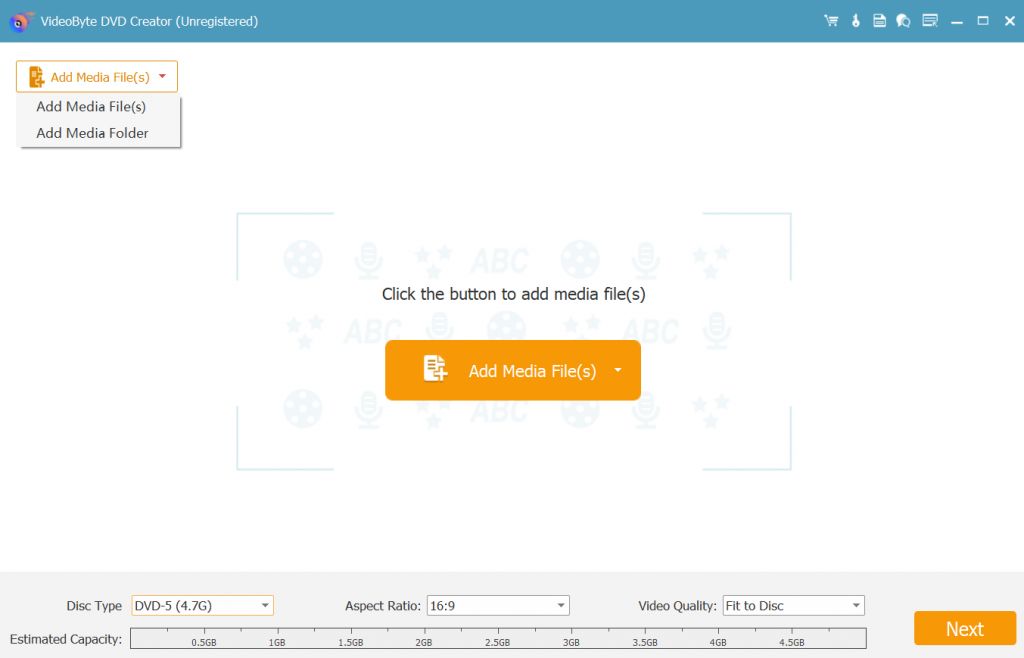
Step 2. Add Videos to the Program
Now click on "Add Files" button to import video into the program. This program does not support drag-and-drop feature.
Step 3. Edit Video before Burning to DVD
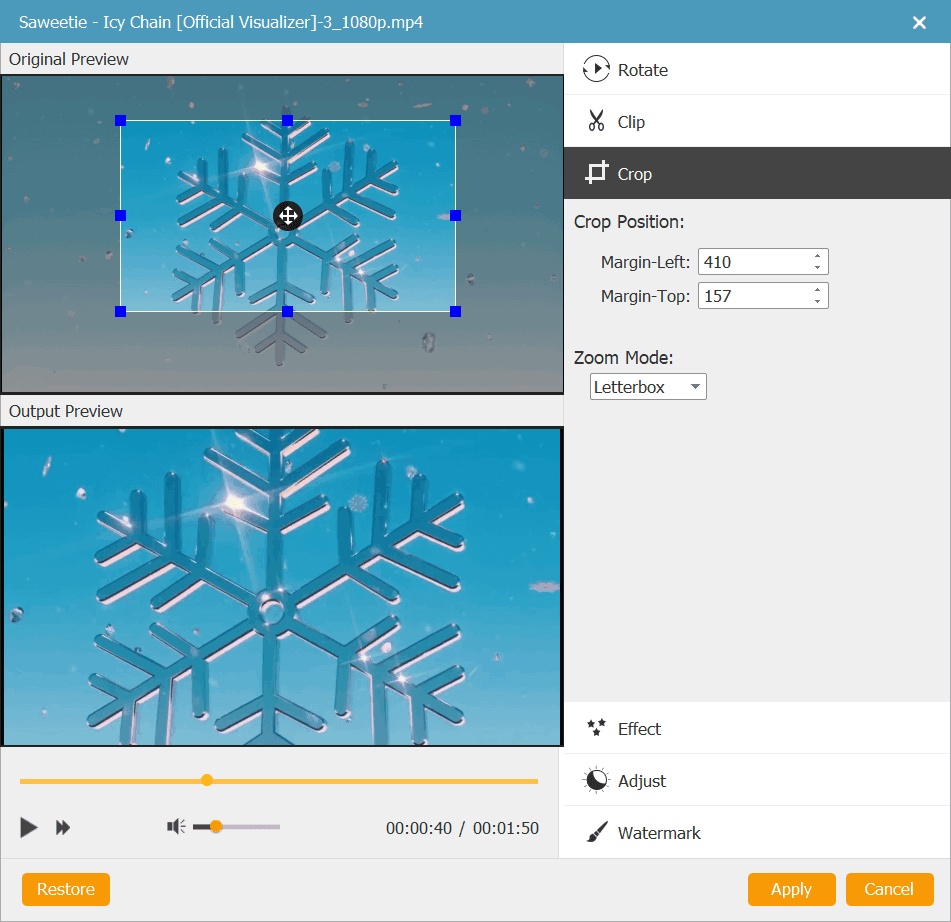
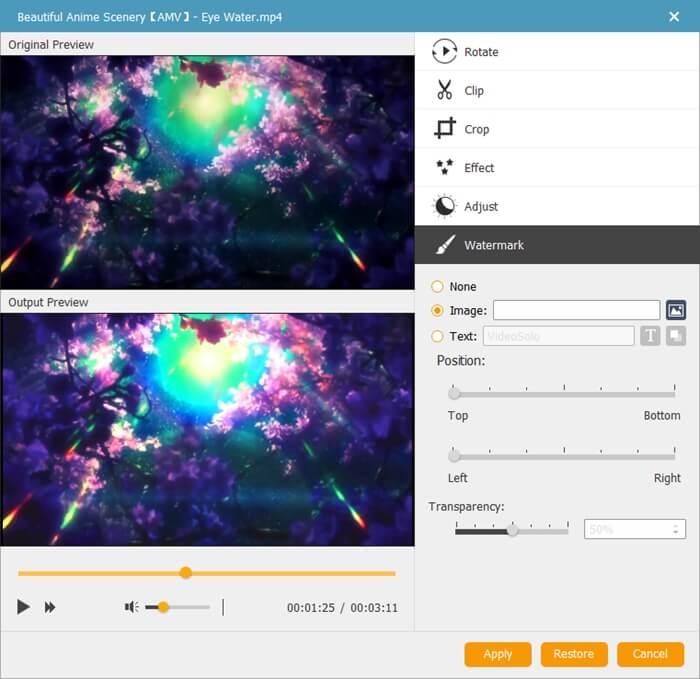
Click on the "Edit" button and the editing window will pop up. You can adjust the video effect by increasing or decreasing the brightness, saturation, contrast or hue settings. And you can also trim the video length, crop video or add watermark into the video. When you finish editing, click on "OK" button to save the changes.
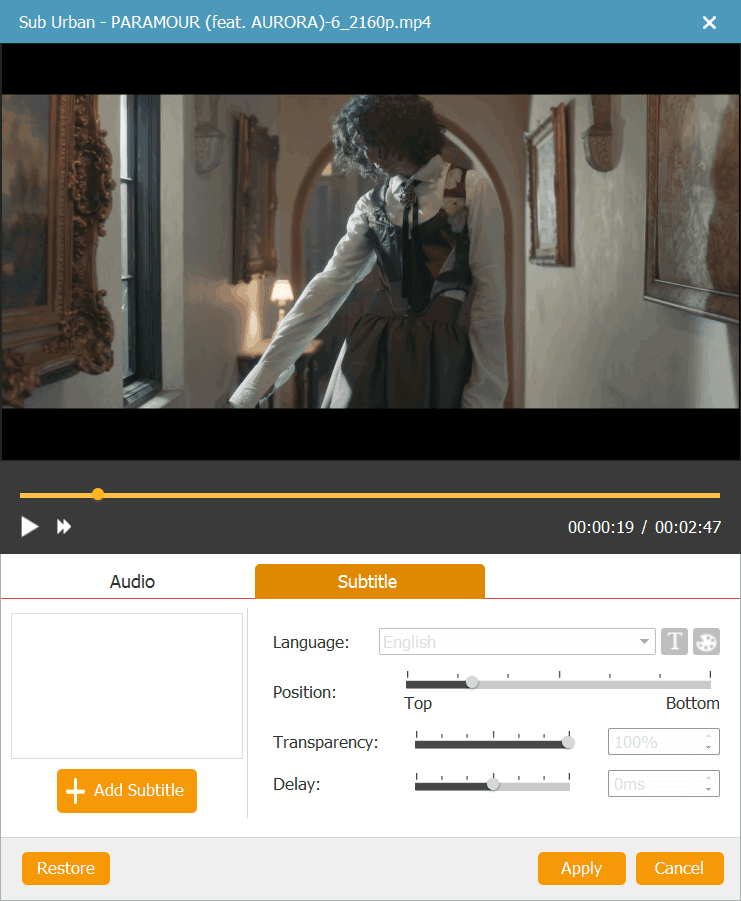
Step 4. Add Subtitle and Audio Track
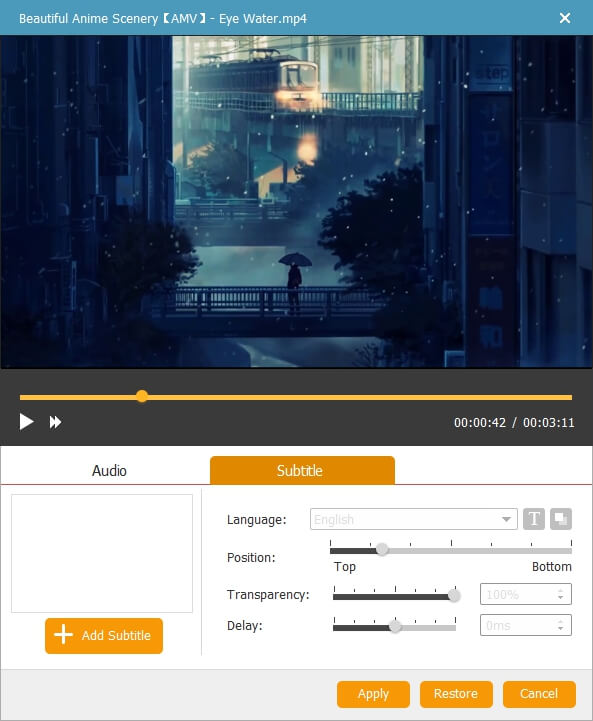
Click on "Audio Track" or "ABC Subtitle" button and a small window will show up. You can first choose or add audio track for your video. After that, you can modify parameters like volume, latency, encoder, bitrate, channels, etc. After that, you can click on "Subtitle" tab to add subtitles to your DVD.
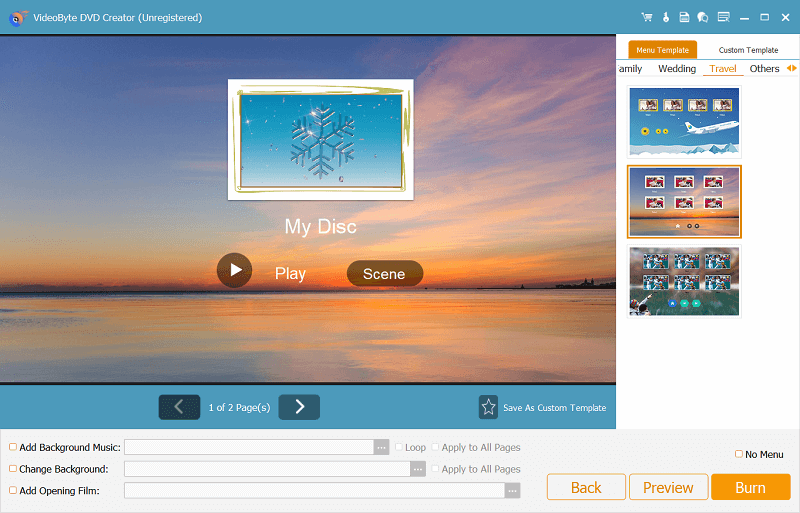
Step 5. Customize DVD Menu with Background Music & Photo
Go to "Menu" section on the right panel of the interface. Click on the "Edit Menu" button to get started. You can select a theme for your menu from the preset menu templates including animal, scenery, festival, plant, etc. After that, you can select he menu frame, menu button and edit menu text in the way you like. You can also add background music, photo and opening film to your DVD.
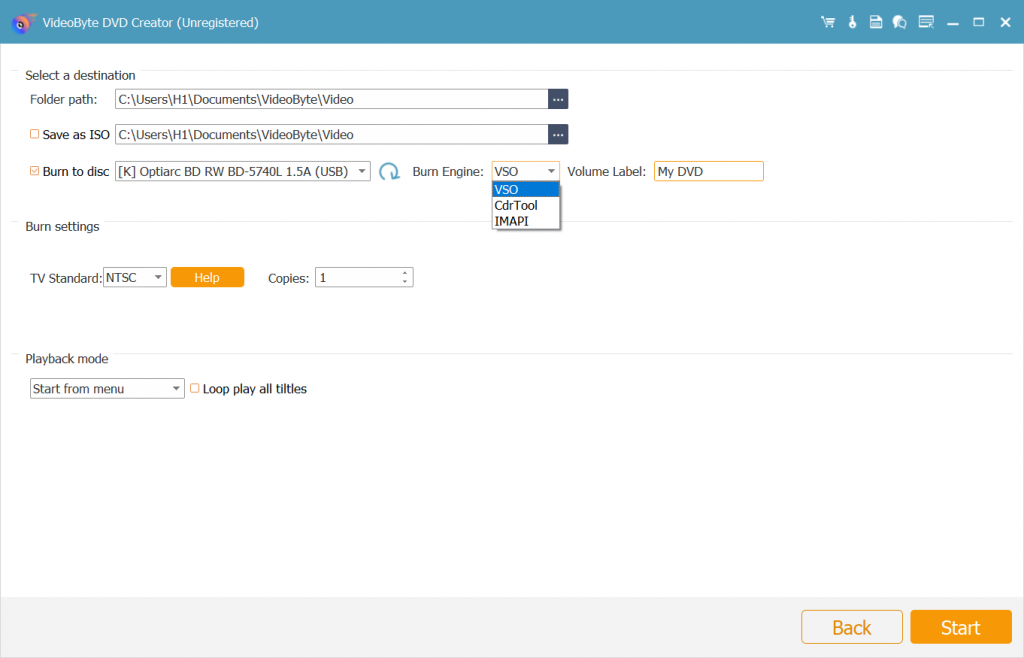
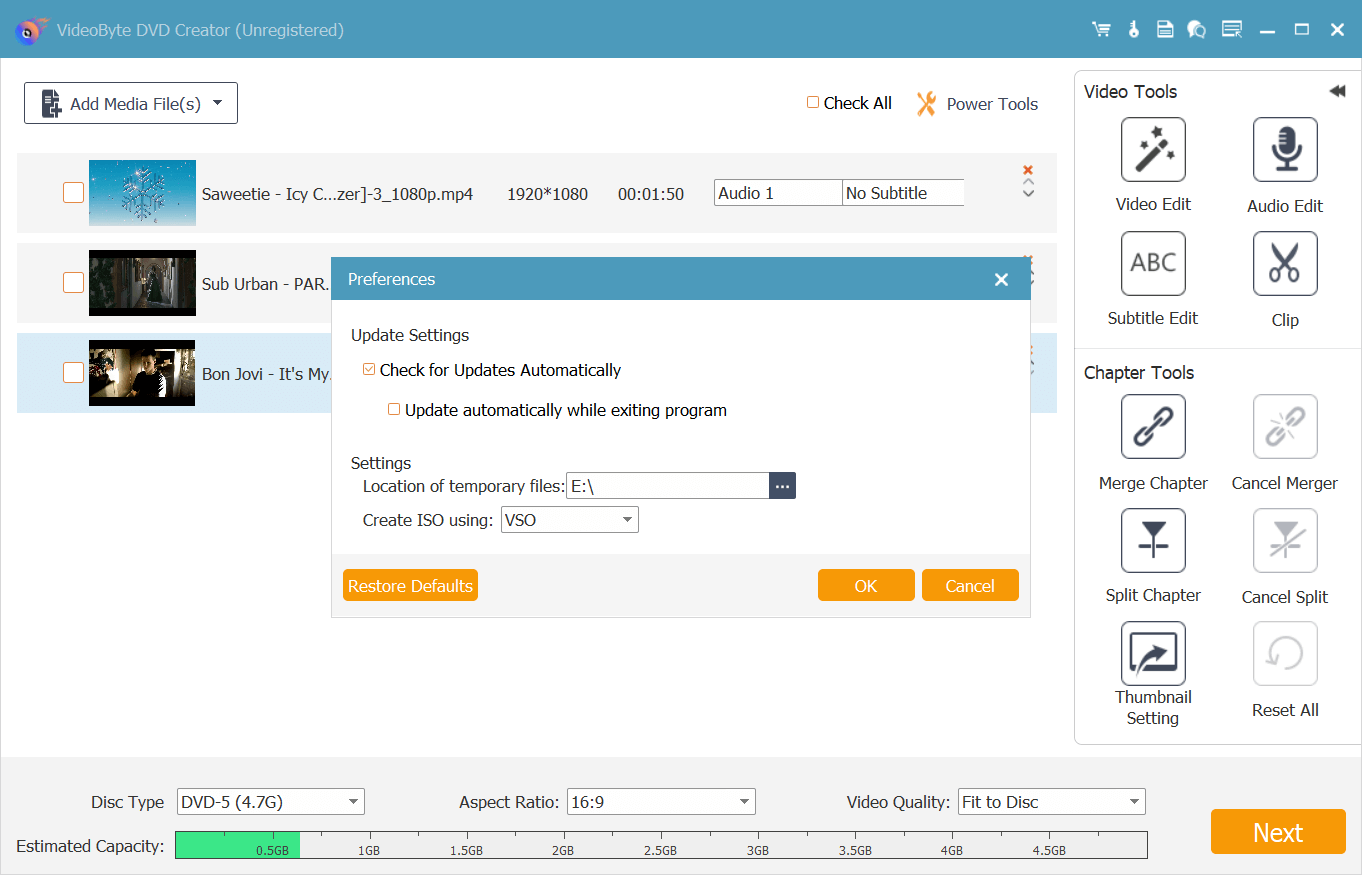
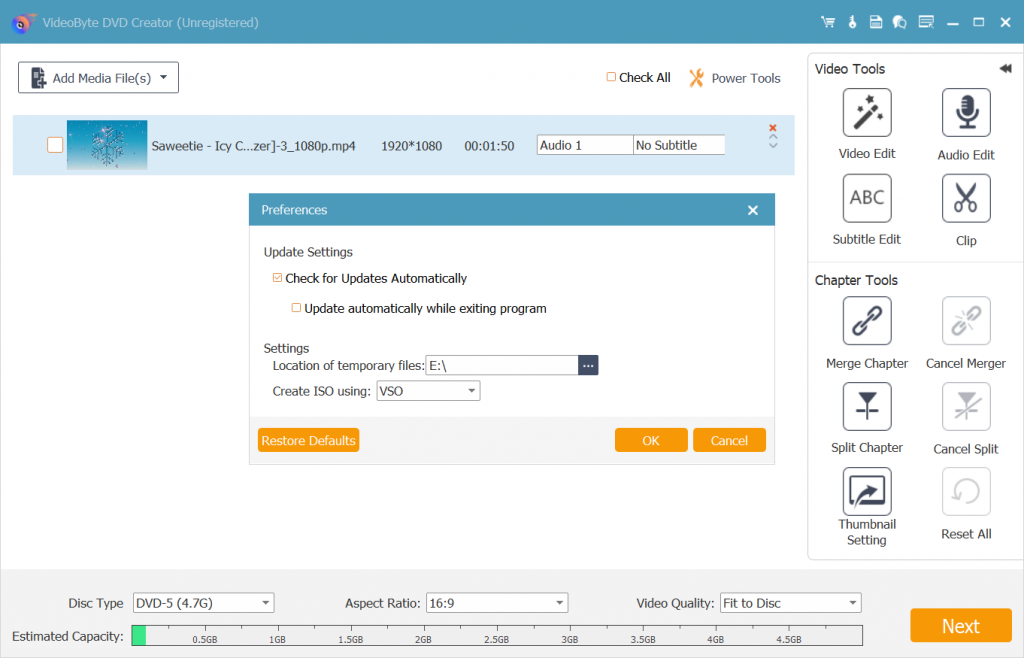
Step 6. Select Output Format and Destination Folder
Now you can go to "Preferences" tab to select output format and change output parameters like resolution, aspect ratio, video bitrate, etc. After that, you can go back to the main interface and select the output folder and DVD type.
Step 7. Burn Video to DVD
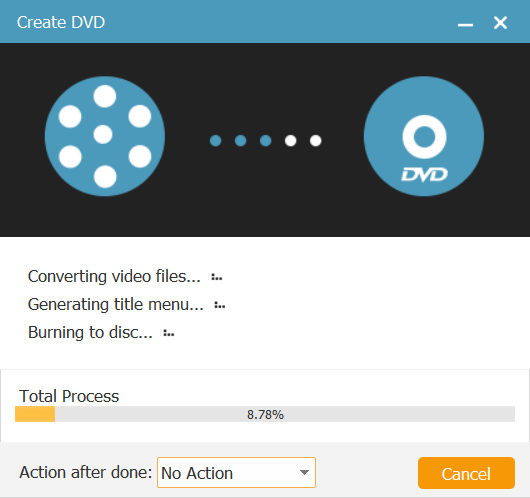
Click on the "Burn" button and the program will start burning video to DVD.
Create Blu-ray Disc
Step 1. Run VideoByte DVD Creator on Windows
Open VideoByte DVD Creator on Windows and let it run. Before creating Blu-ray Disc, make sure you can see the interface as below. Choose "Blu-ray Disc" to start creating.
Note: Mac user is out of luck to enjoy this function.
Step 2. Connect to Blu-ray Drive
Connect computer to Blu-ray drive and then insert a blank disc.
Step 3. Import Videos
Click "Add Files" to import one or more Blu-ray videos to the software. If you have a folder of videos, you can add the entire folder to burn to disc.
Step 4. Edit Videos Before Burning
You are able to edit your videos after adding to the program to make your own unique Blu-ray disc. Just click the icon of "Video Edit" and you can rotate, clip, crop, add effect and adjust videos from the pop-up windows.
Step 5. Add or Edit Audio Track
From "Video Tools", click "Audio Edit" to add other audio tracks into the video by hitting the button of "Add Audio".

Step 6. Add Subtitle (Optional)
Click "Subtitle Edit" to enter the interface of editing subtitle if you want to add subtitle to the video.
Step 7. Customize Chapter
From the "Chapter Tools", you can "Merge Chapter", "Cancel Merger", "Split Chapter", "Cancel Split", or adjust "Thumbnail Settings". From the windows of "Thumbnail Settings", you can "Intercept the current video screen as thumbnail", "Intercept video clips as thumbnail" or "Upload a local image as thumbnail".
Note: If you are unsatisfied with the above settings, you can click "Reset All" to restore the original settings.
Step 8. Parameter Settings of Blu-ray Disc
"Disc Type", "Aspect Ratio" and "Video Quality" are optional to choose according to your personal requirements.
Note: If you are unsatisfied with the above settings, you can click "Reset All" to restore the original settings.
Step 9. Edit Menu
Click "Next" to enter into the Menu interface. You are free to select "Menu Template" from the theme of "Holiday", "Family", "Wedding", "Travel" and "Others". Or you can custom Menu Template when you save template from the "Menu Template". If you don't want any menus to be added to your Blu-ray disc, just tick the box before "No Menu".
Step 10. Start Burning Videos to Blu-ray
Click "Burn" to continue choosing the "Burn Engine" or you can select burning to ISO here. Finally, you need to click "Start" to begin Blu-ray burning process.