How to Rip and Upload DVD to Cloud

BD-DVD Ripper
For what reason that you want to know how to upload DVD to cloud, as for me, that's because I can store those files on a server to save some precious DVD disc from scratching and stream them at anytime. On another hand, with the rapid development of Internet, cloud storage service is getting more and more popular among people because it gets easier for you to watch movies, play videos or store some important files. However, you cannot directly upload the DVD to cloud, you need to first transfer the DVD into some cloud compatible video format then stream them to the cloud.
Rip DVD to Digital Formats Firstly
As a matter of fact, it is not available for you to copy DVD content to cloud storage service directly because all DVDs are protected with encryption. You'd better rip DVD into digital formats and then upload them to cloud. Therefore, a third-party DVD ripper is gonna to help you. Here, VideoByte BD-DVD Ripper is highly introduced to you. With this fast and easy-to-use ripper, you can:
Rip any DVD movies to cloud supported formats without limitation;
Get the best solution to watch DVD on cloud storage service;
Do DVD conversion with fast speed to save the time of uploading to cloud;
Make conversion with few clicks thanks to its intuitive interface.
...
Useful tutorial on how to rip DVD to digital video is listed below.
Note:
The Windows version of VideoByte BD-DVD Ripper released a new version which has big changes compared with the old version. But the new version for Mac is still under the development. That means the interface and the operation of Windows and Mac will be different.
To know the details about the new version, you can read on the article: A New Version for BD-DVD Ripper (Windows) Released! See What Changes
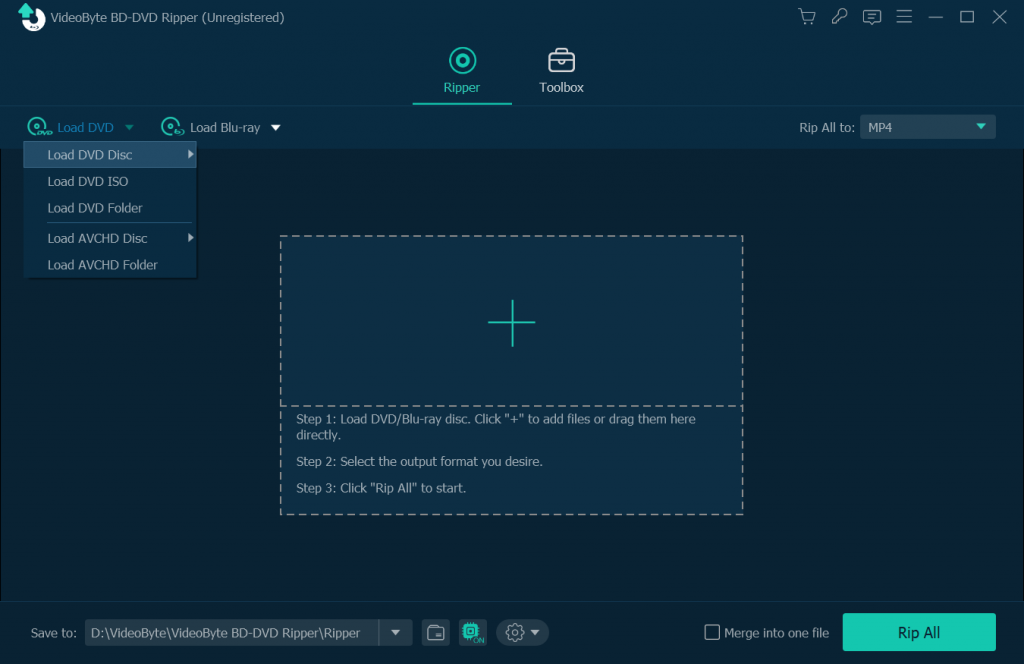
Step 1. Load Disc
As long as you install and launch the VideoByte DVD Ripper on your PC, insert a DVD disc then your computer will read your DVD content. Click "Load DVD", then "Load DVD Disc" to upload the files to the program.
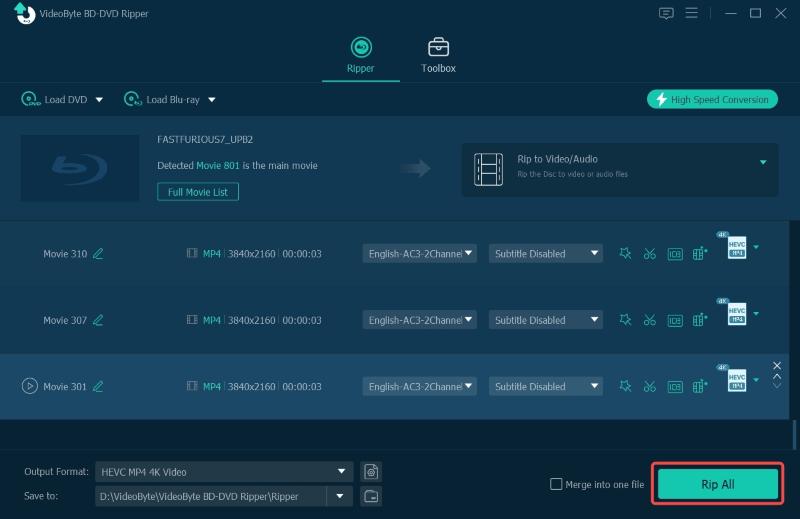
Step 2. Choose Output Format
Click the "Rip All to" section, you can choose the format you need from the drop-down list. Generally speaking, MP4 is the most widely used format supported by nearly all platforms. If you are going to transfer your DVD to Dropbox, you can choose formats like MOV, MP4, MKV, AVI and FLV. Or you like to convert DVD to Google Drive, formats including MP4, MOV, AVI, WMV, FLV are available. It all depends on where you want to upload your DVD.
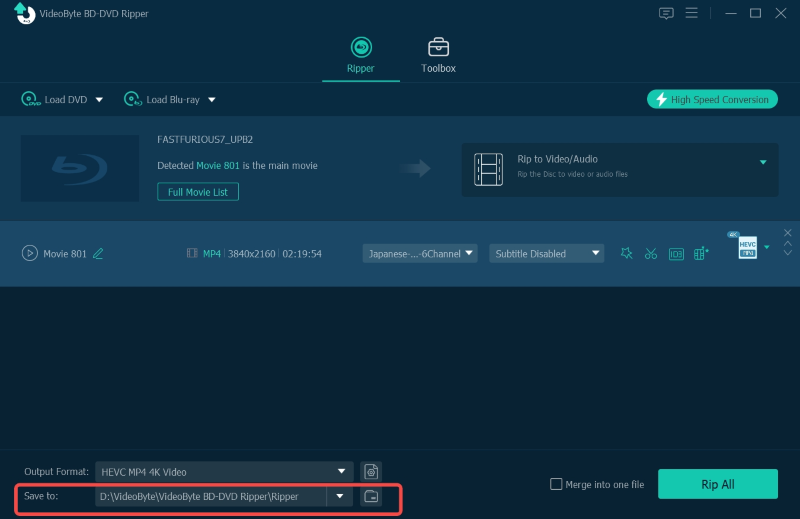
Step 3. Select Output Folder
Click "Browse" to change your destination folder of the converted DVD file to enable you to open this files.
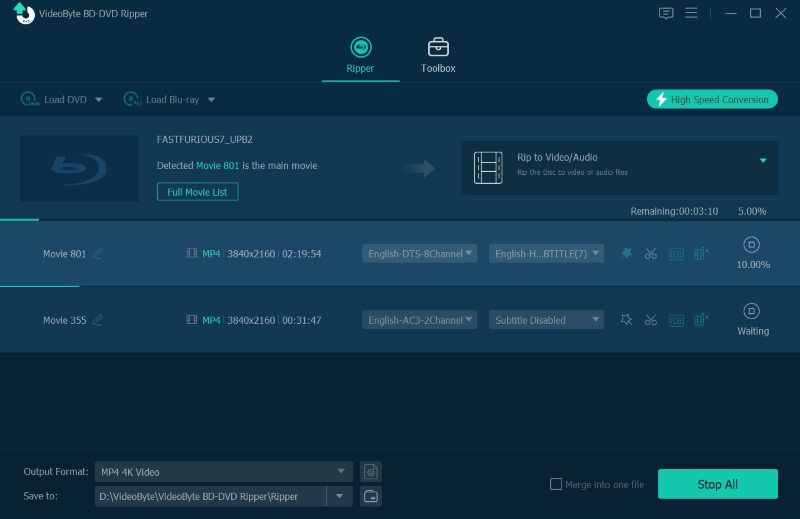
Step 4. Start Converting
Click the "Rip All" button to start ripping the DVD movie.
Upload Converted DVD to Cloud
Now, you can upload your converted DVD to cloud. As there are so many cloud storage services on the market, I would like to take three of them as examples, Google Drive, Dropbox and Onedrive, and show you how to upload DVD to cloud.
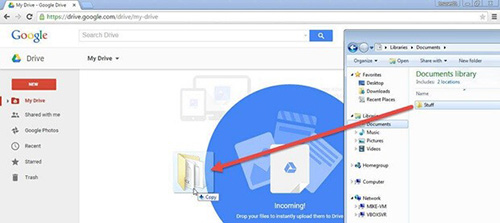
1. Google Drive
Easy guide:
Open Google Drive on your PC and sign in
Create a folder
Upload the converted DVD files or folders to the Google Drive folder
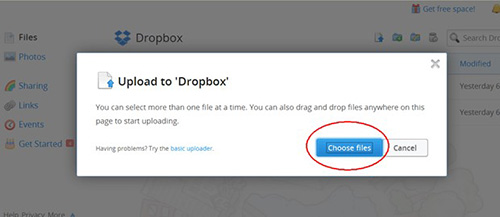
2. Dropbox
Easy guide:
Open the website of Dropbox then sign in your account
When you choose the upload button, you can find a window pop up, then click "Choose Files"
Choose the converted DVD files and click "Open" to upload to the Dropbox
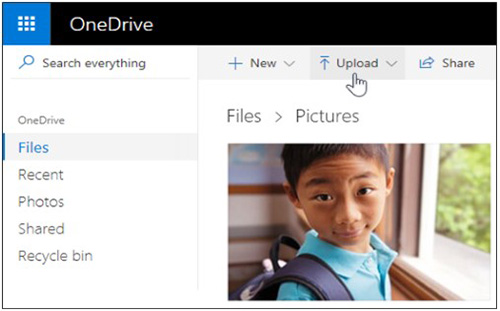
3. OneDrive
Easy guide:
Open the OneDrive website, then sign in your account
Select "Upload" to import your DVD files
Then you can open the ripped files and enjoy
Here it is! Now you can upload your precious DVD to cloud with easy steps. You don't have to worry about the loss or damage of your DVD any longer, and you can enjoy your favorite DVD movies at anytime and anywhere. With VideoByte BD-DVD Ripper, you are able to get the ultimate solution to rip DVD to cloud.
Hot Articles