How to Save a DVD to Mac Easily (4 Ultimate Ways)
- By Karen Nelson
- 07/09/2023

BD-DVD Ripper
It is well known that Mac computers are not equipped with an internal DVD drive, meaning that you have to carry one to play DVDs on Mac. Hence, some of you wonder how to save a DVD to Mac so that you can play the disc without an external DVD drive. Luckily, this blog has collected all ways to help you do it!
In the following, you will go through 4 ultimate methods, including two ripping solutions and one DVD duplicate as well as recording ways to copy DVD on Mac. Now, let’s go through them and grasp how to save DVD to Mac for more flexible streaming later!
How to Save DVD to Mac by Ripping It to Digital
To save a DVD to Mac, the best method is by ripping the media out of the discs, and converting it to digital files encoded with mainstream formats like MP4. When you get a digital copy of the DVD content, you are available to play DVD on Mac with those common media players, without connecting to an external DVD hard drive anymore.
Save DVD to Mac with VideoByte BD-DVD Ripper (Protected DVDs)
If you get a protected DVD and desire to digitalize it and save on Mac to play without using a DVD player hardware, VideoByte BD-DVD Ripper is absolutely the best tool you shall not miss.
As the software also embeds multiple hardware acceleration teches to lower its CPU consumption, you are able to copy DVD to Mac at 6X faster speedy performance and save much time. Even for hours-long DVD movies, VideoByte BD-DVD Ripper will only cost you a few minutes to complete the ripping. Among all Mac DVD rippers on the market, it stands on top regardless of the output quality or efficiency to copy DVD to Mac.
All Great Features of VideoByte BD-DVD Ripper
- Compatible with both encrypted and homemade DVDs, Blu-rays, and ISO images;
- Over 300+ formats and device models to output ripped DVDs;
- Maintain a 1:1 ratio to save DVDs on Mac/Windows at no quality loss;
- Full preservation of audio tracks and subtitles for ripped DVD outputs;
- Acceleration teches to ensure 6X faster speed to copy DVDs to digital formats;
- Embedded video editor to further edit DVD outputs without hassle.
Next, grasp the brief guide and follow to see how to save DVD to Mac via VideoByte BD-DVD Ripper within several simple clicks:
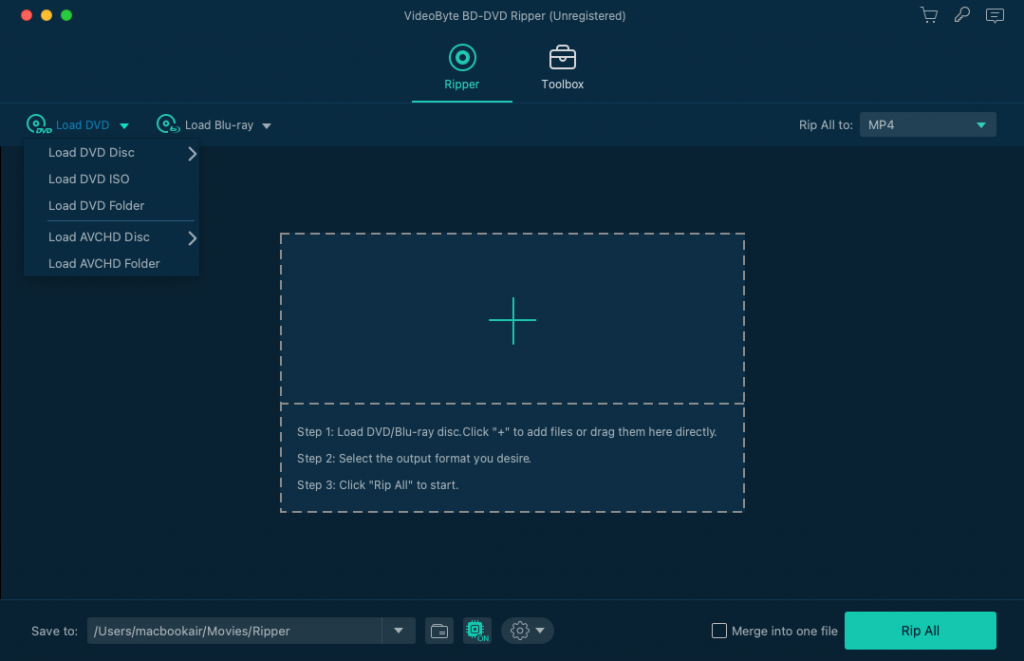
STEP 1. Import DVDs to Mac
To begin with, complete the software installation and open VideoByte BD-DVD Ripper on Mac. You are required to insert your DVD disc to the computer and select "Load DVD" > "Load DVD Disc" in the software to load DVD media inside the Mac DVD ripper.
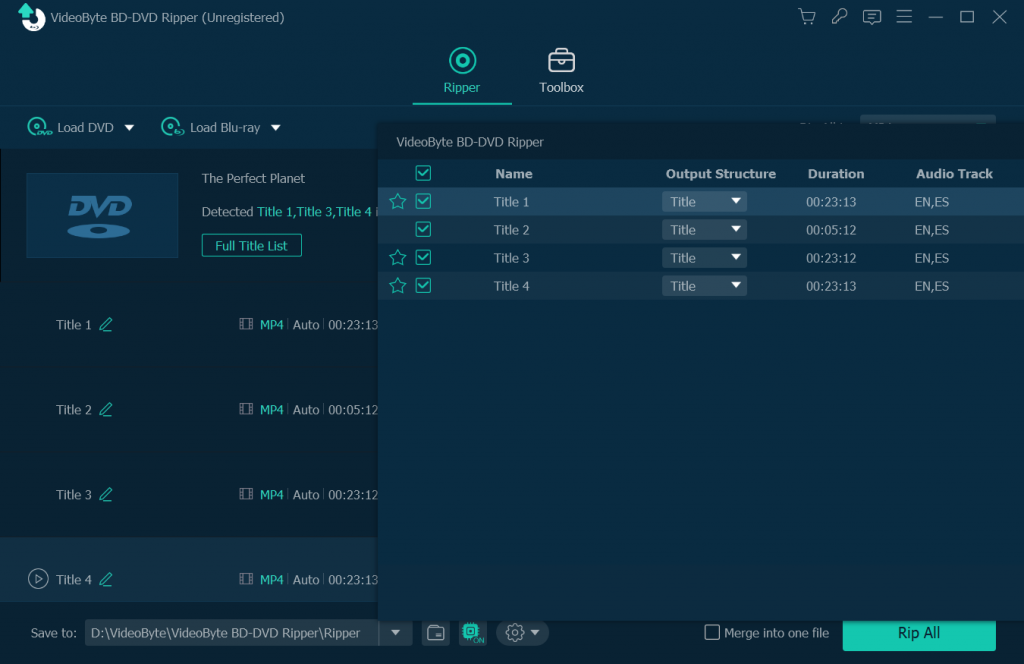
STEP 2. Select DVD Titles to Copy on Mac
When the DVD media is loaded in VideoByte BD-DVD Ripper, you are able to select all DVD titles you desire to copy on Mac based on your needs. Simply click the "Full Title List" and choose those you desire to copy. You can skip this step and the software will rip the main title for you by default.
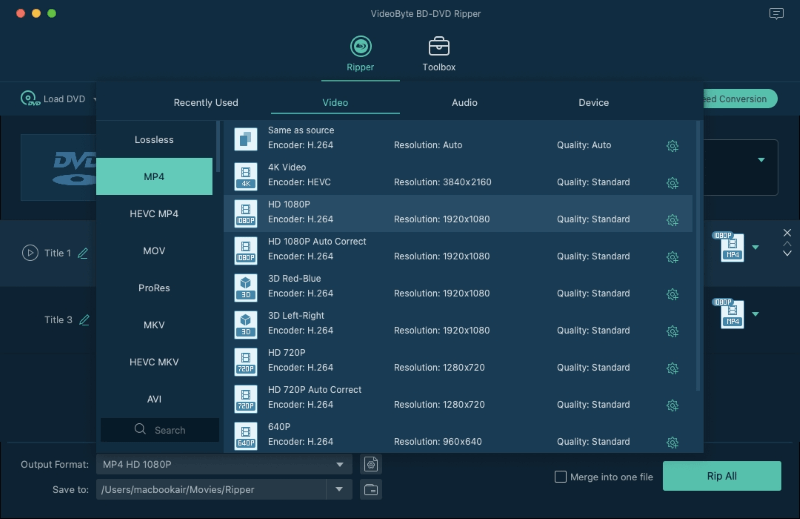
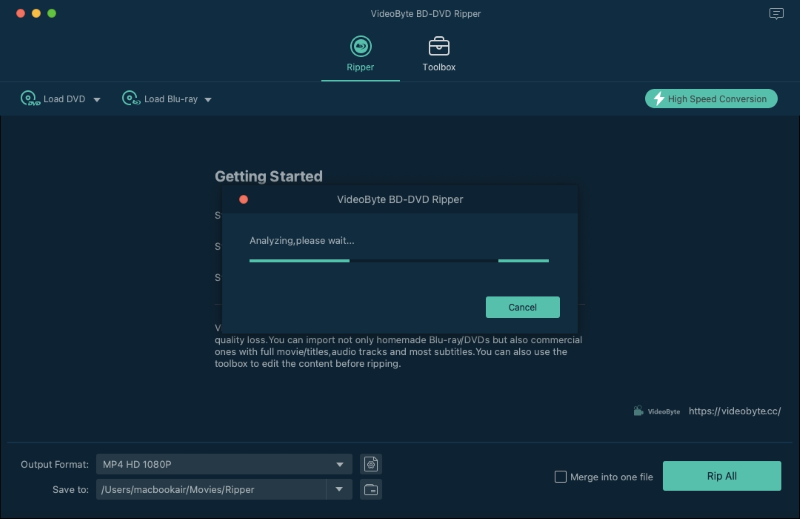
STEP 3. Customize Output Parameters
From the upper-right "Rip All to" format menu, you are available to customize the output format and resolution to copy DVD on Mac as you desire.
Tips: We recommend MOV - QuickTime Video (*.mov) if you want to save DVD to Mac and then play the ripped DVD video on it directly.
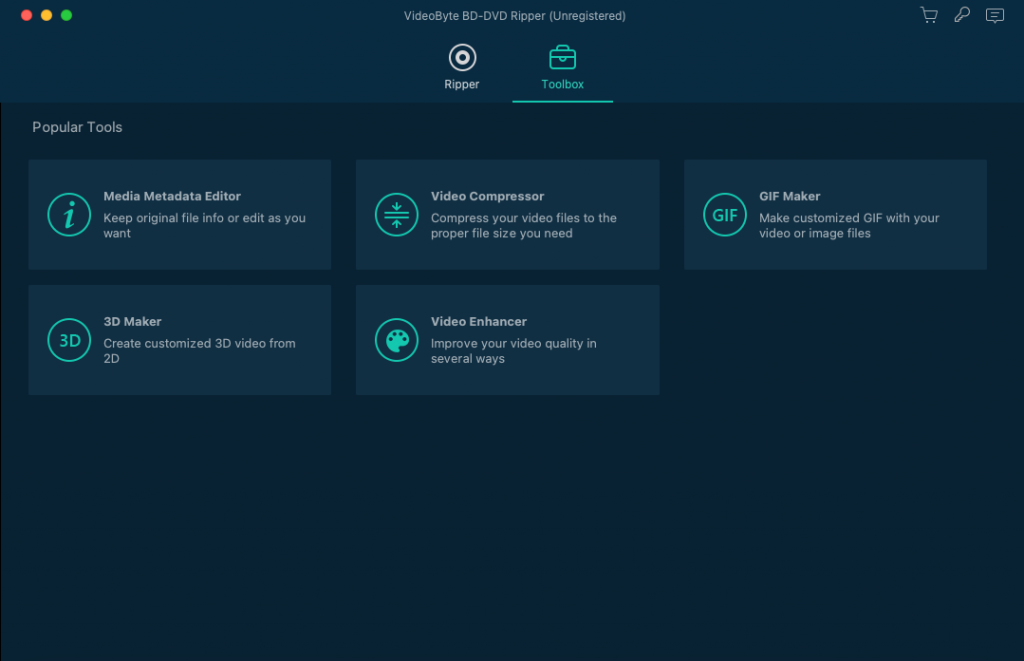
(Optional) STEP 4. Edit DVD Media Before Ripping
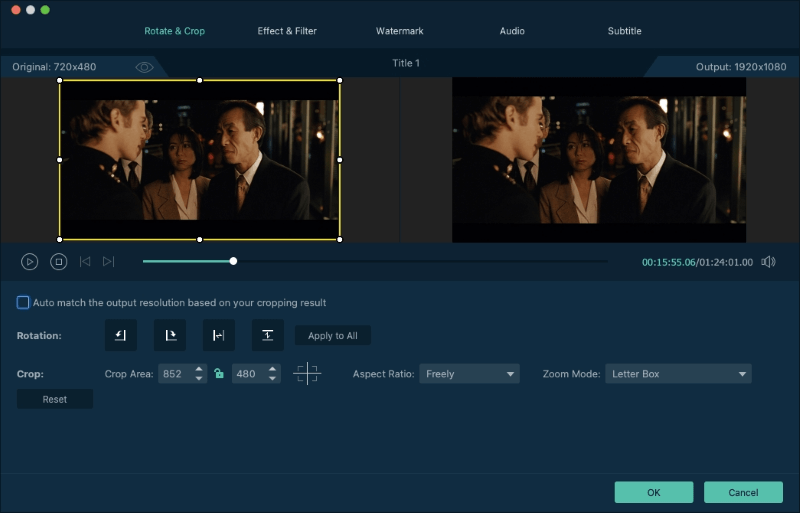
This is an optional step. Before ripping DVD to Mac, you can do some edition to the DVD videos. First of all, choose a DVD title you want to edit, then click "Toolbox" to start the video editing works. You are able to edit media metadata, compress the video, make personalized GIFs, or turn your video into 3D formats. And you will probably need one of its useful tools, which is Video Enhancer.
Here you are able to easily edit and adjust the DVD video. In this step, you can crop, rotate (including 90 clockwise, 90 counterclockwise, horizontal flip and vertical flip), add watermark to the DVD video or adjust other effects like brightness, contrast, saturation and hue of the video by clicking the button of "Effect & Filter".
STEP 5. Copy DVD to Mac
When the output parameters are selected and you have gone through all required video enhancement and editing, you are able to process the conversion and start duplicating DVDs Mac. VideoByte BD-DVD Ripper will then process at 6X faster speed to copy DVD on Mac in minutes for you. Wait for its completion patiently!
Save DVD to Mac with HandBrake (Homemade Only)
STEP 1. After installing the HandBrake, open it on Mac and insert your DVD disc. Then in the software, select "Source" > "Open" to load the disc.
STEP 2. When all DVD titles are detected, you are able to select those you need to copy on Mac from the menu and select " Add to Queue".
STEP 3. Next, choose MP4 or MKV as the output format. You are able to further customize other ripping settings such as the encoder, subtitles, and audio tracks as you desire.
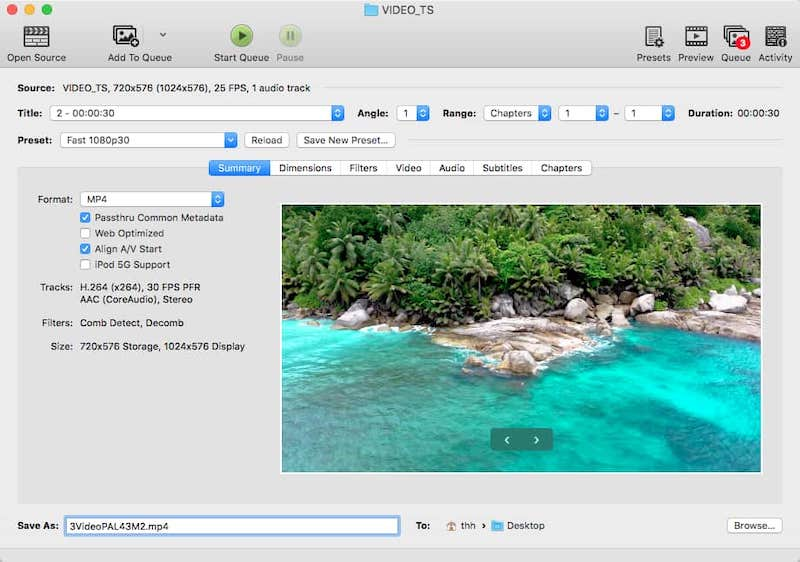
STEP 4. Now, also move to "Destination" and click "Browse" to select an output folder. By clicking "Start" and HandBrake will process to import DVD to Mac in digital format for you.
How to Save DVD to Mac with DVD Copying Software
Despite digitizing DVDs to regular media files, another solution helping to save DVD to Mac is by copying the whole disc using a DVD copying software.
Let’s also grasp the way on how to save a DVD to Mac by copying the disc via VideoByte DVD Copy:
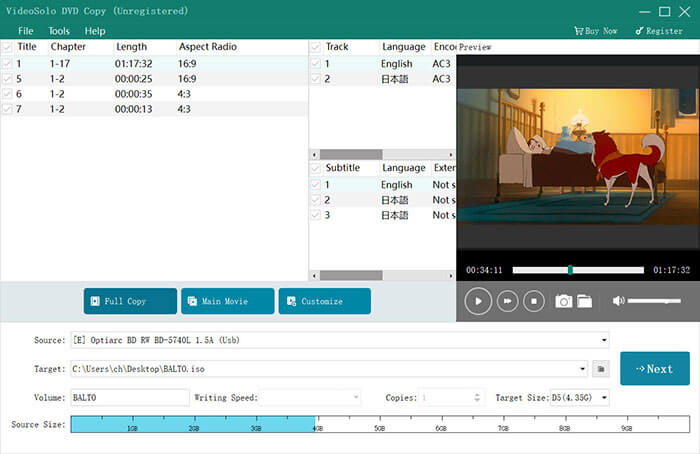
STEP 1. Insert your DVD disc to Mac via an external hard drive. Then also launch VideoByte DVD Copy to load it by going to "File" > "Select Source" > [Your disc name].
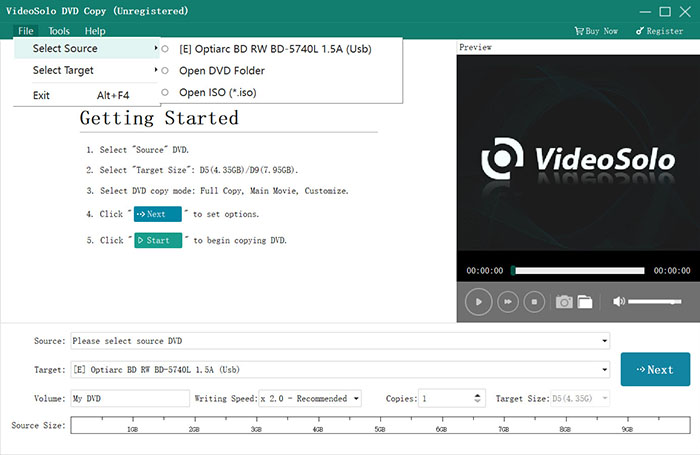
STEP 2. To copy DVD to Mac, you will need to select ISO image format or VIDEO_TS folder option to export the DVD media. Simply go to "Target" and choose the one you need.
STEP 3. Next, select a copying mode to rip a full copy of the disc, or just parts of it by choosing "Main Movie" or "Customize" mode. Complete the selection by hitting the "Next" icon.
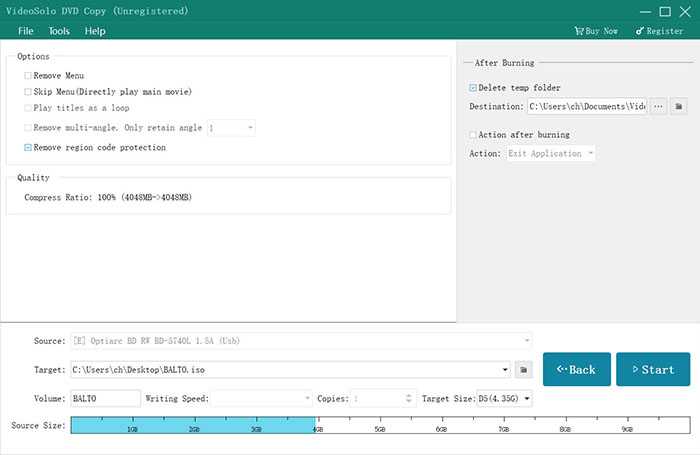
STEP 4. Now, also customize the copying settings like choose to skip menu, remove multi-angle, remove region code protection, etc. in preferences.
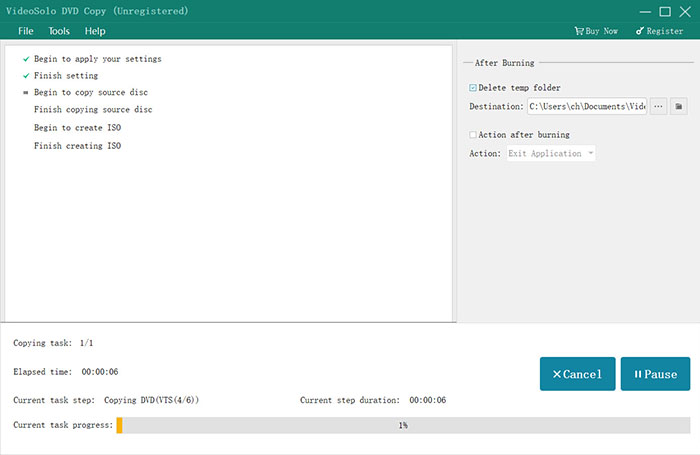
STEP 5. Finally, give a go on the "Start" icon, and VideoByte DVD Copy will start save DVD to Mac for you at a quick speed.
How to Save DVD to Mac by Recording
Instead of copying a complete DVD movie on Mac to take up much storage, recording can be a flexible way to can take use of to save DVD to Mac. Hence, if you desire to record parts of DVD and save them on Mac without quality loss, VideoSolo Screen Recorder is the best option you shall not miss.
Also, you are able to grasp how to save DVD to Mac via VideoSolo Screen Recorder just by clicking:
STEP 1. To get started, launch VideoSolo Screen Recorder and select "Video Recorder". You are required to adjust the recording area and system volume in requirements. Remember to turn off microphone to avoid capturing noise.
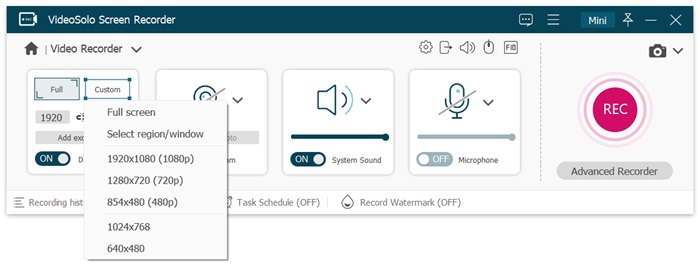
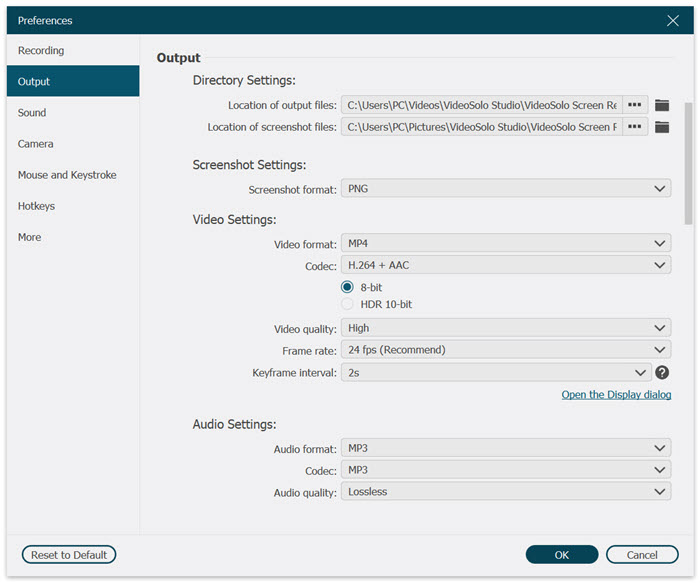
STEP 2. Go to "Preferences", you are available to customize output parameters such as the codec, quality, frame rate, etc. as you desire.
STEP 3. Now, import DVD to Mac and play it. Meanwhile, you are required to tap the "REC" icon to process the recording.
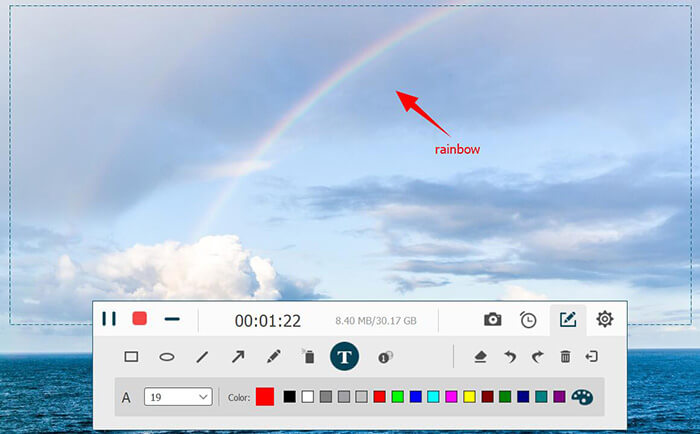
STEP 4. Simply tap the "Stop" icon to record and save DVD to Mac. In the previewing mode, you are available to trim the video in preference. Then hit "Save" and the recorded DVD file can be outputted on desktop right away.
FAQs of Saving DVD to Mac
Still have confusion on how to save a DVD to Mac? Grasp these FAQs and see if they solve your questions.
Q1. How to save a DVD to Mac with Disk Utility?
A: The built-in software, Disk Utility can also help you save a DVD to Mac without installing extra software. It will take only 3 steps for you to complete the whole process:
STEP 1. Insert your DVD disc and load it on Mac.
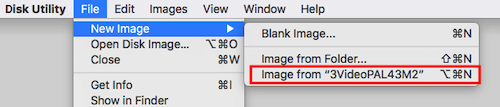
STEP 2. Go to "Applications" > "Utilities" to open Disk Utility.
STEP 3. Select the detect DVD disc, then click "File" > "New Image" > "Image from [your DVD disc name]" and export it to save on Mac right away.
Q2. How long will it take to save a DVD on Mac?
Conclusion
Hot Articles