How to Transfer and Convert MiniDV to DVD Effortlessly
- Karen Nelson
- 26/06/2023

DVD Creator
Many of you are more likely to capture your valuable life moments via MinuDV instead of simply taking static photos. However, MiniDV degrades over time, making you desire to burn MiniDV to DVD for preserving the videos to play on DVD player. Unfortunately, many of you turn out to be aimless and don’t know what to do.
Actually, to convert MiniDV to DVD, you will need to transfer MiniDV to computer first and burn it to DVD with a DVD creator. This blog, there will provide the best method to guide you on how to convert MiniDV to DVD losslessly. Now, keep reading and grasp how.
How to Convert MiniDV to DVD with best DVD Creator
As mentioned, as many DVD creators available for you to convert MiniDV to DVD supports importing media files of regular formats, you will need to digitalize MiniDV to mainstream video formats such as MP4, MOV, etc. before starting to convert MiniDV to DVD.
Once you get the digitalized MiniDV videos, to burn them to DVD, you only need help from VideoByte DVD Creator, the best DVD creator software available for both Windows and Mac users to burn DVD discs from 100+ types of media formats to you.
Despite the lossless quality it is able to preserve for you, another highlight of VideoByte DVD Creator should be its easy-to-grasp built-in editing tools, audio tracks and subtitles customization features, and also well-prepared templates to help you create DVDs from MiniDV videos for making your valuable moments unique.
Overall Great Features of VideoByte DVD Creator
- Available to create common DVDs, Blu-rays types, or ISO files from a variety of mainstream formats;
- Up to 720p, 1080p, and even 4K resolutions to encode media in DVD discs;
- Preset menu templates to create vivid DVD themes without hassle;
- 3D videos burning supported;
- Easy-to-grasp editing features provided;
Steps to Convert MiniDV to DVD with VideoByte DVD Creator
Next, also grasp the steps to convert MiniDV to DVD via VideoByte DVD Creator with ease:
NOTE: You are required to prepare a blank and recordable DVD disc for converting the MiniDV videos.
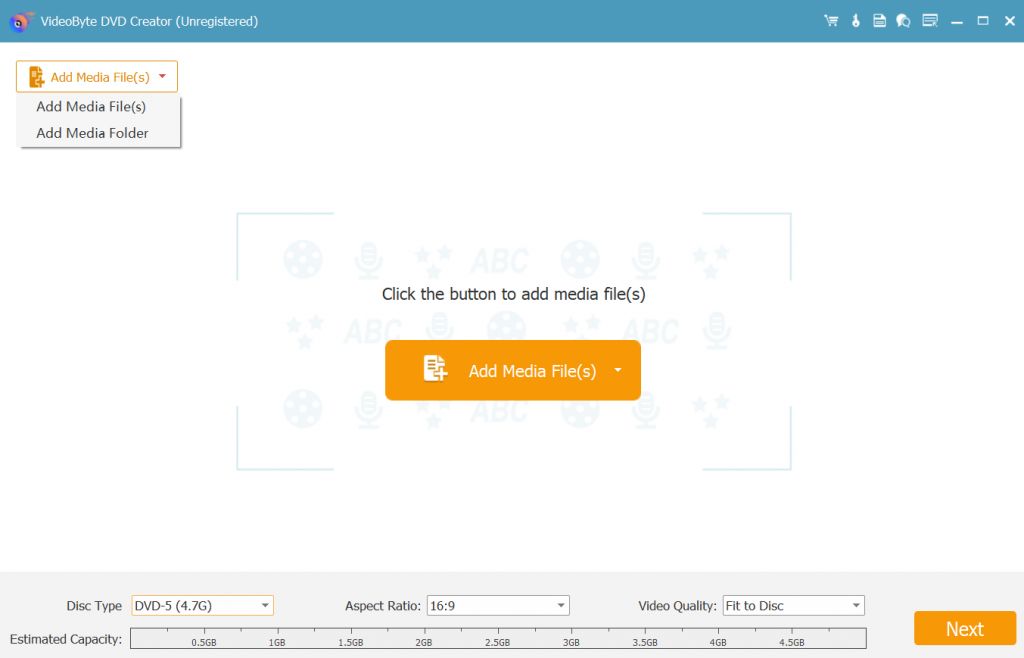
Step 1. Add MiniDV Videos to the Program
After downloading and installation of the program, launch the program on your computer, then you will see an interface pop up.
Click the "Add Files" button to import videos to the program. It is not available to drag-and-drop your files into the program.
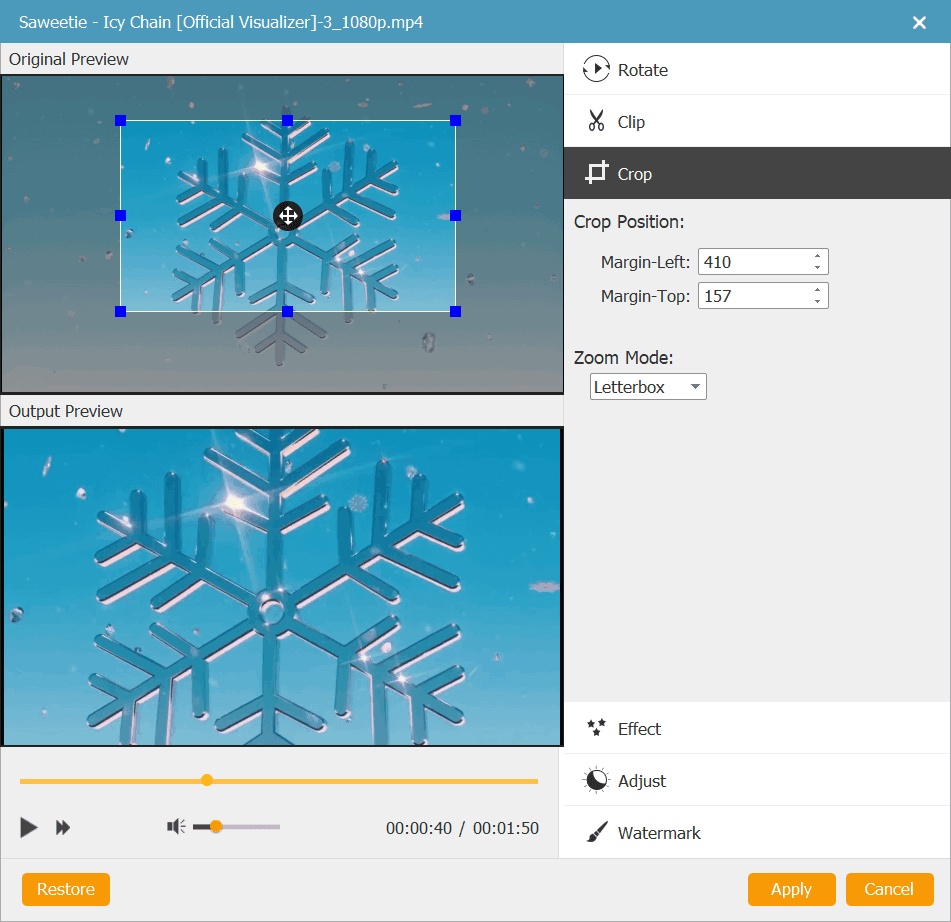
Step 2. Edit MiniDV Video (Optional)
Go to the "Edit" button and you can do some alternation as you like. You can adjust the video effect by decreasing the brightness, saturation, contrast or hue settings.
Additionally, you can also trim the video length, crop video or add watermark into the video.
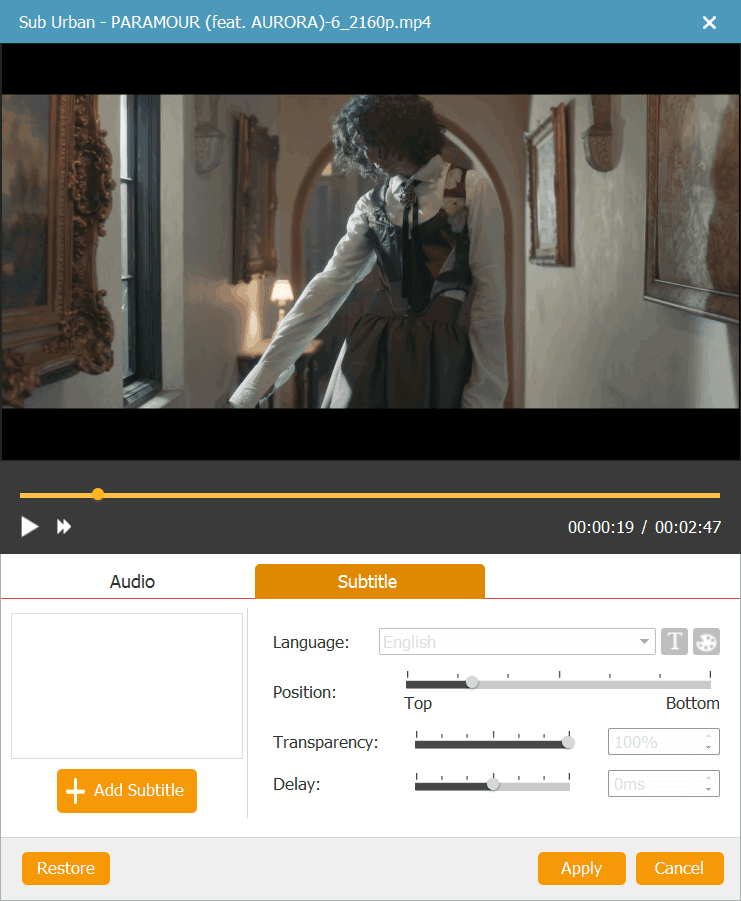
Step 3. Add Subtitle and Audio(Optional)
Click on "Audio Track" or "ABC Subtitle" button and you can choose or add audio track for your video from the small window. After that, you can change parameters like volume, encoder, bitrate, channels etc. Then you can click on "Subtitle" to add subtitles to your DVD.
Step 4. Select Output Format and Destination Folder
Here, you can select output format and change output parameters like resolution, aspect ratio, video bitrate, etc. After that, select an output folder and DVD type.
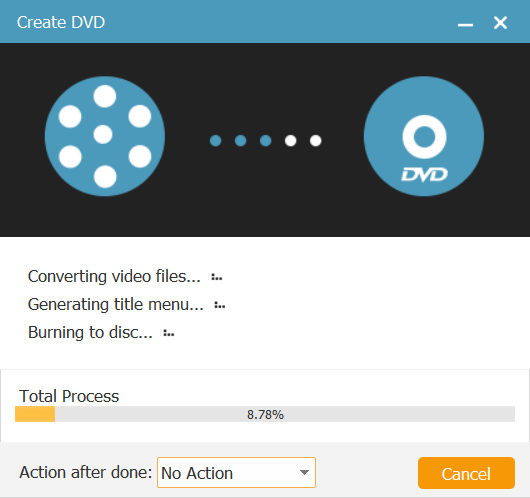
Step 5. Convert MiniDV Video to DVD
Finally, simply give a go on the "Burn" button and the program will start to convert MiniDV to DVD with speedy performance for you. The process will be completed within just minutes!
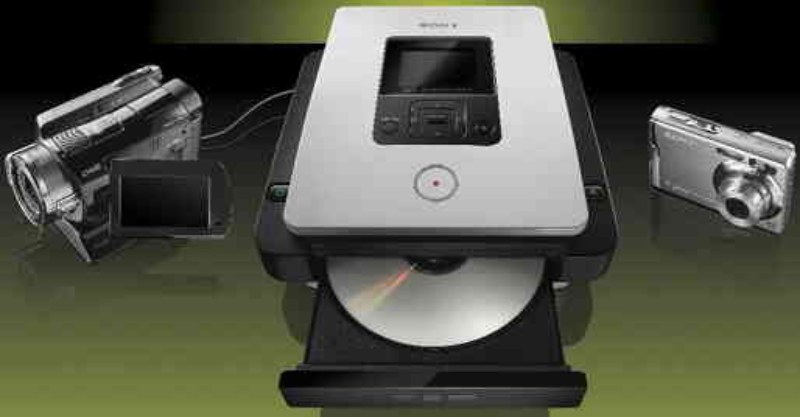
How to Convert MiniDV to DVD Using Recorder
If you get a physical DVD recorder of Sony, Panasonic, and other brands, it is absolutely possible for you to convert MiniDV to DVD with their helps. This is a direct method and you are only required to connect your MiniDV camcorder to it via HDMI Cable, S-video, or RCS Audio-Video Cable.
Then insert a DVD disc and you are able to get MiniDV videos transferred to the DVD disc right away. The steps below will also guide you through how to convert MiniDV tapes to DVD:
STEP 1. Connect your MiniDV camcorder with DVD recorder using a connection cable compatible with both devices.
STEP 2. Then, insert the DVD disc to the DVD recorder, and also put the MiniDV tape to the camcorder.
STEP 3. Now, press the play button on camcorder and also select to start recording on DVD recorder simultaneously. Then the inserted DVD will be recorded with the MiniDV videos right away.
Extra Tips: How to Make a Good DVD by Yourself
1. Choose a DVD disc with a suitable capacity
2. Select the Best Format to Convert MiniDV to DVD
3. Ensure your DVD Disc Compatibility with DVD Player
4. Protect your DVDs
To preserve the high-quality DVDs you can store them in a good case to avoid scratches and other damages. Besides, you can appropriately clean or polish your DVDs after watching or once in a while. In case that you have got your DVDs scratched, you can read the "methods to fix scratched DVD" to find ways to repair your DVDs.
FAQs About Transferring MiniDV to DVD
How Do I Transfer MiniDV to My Computer?
To transfer MiniDV to computer, you only need to connect your MiniDV camcorder to your computer via a USB or AV cable, then prepare a desktop screen recorder follow the steps below to process it correctly:
STEP 1. Connect both devices.
STEP 2. Insert the MiniDV tape to the camcorder and set to VCR mode. Remember to complete loading the tape first.
STEP 3. Now, open the recording software on your computer. When the MiniDV tape starts playing, submit to record the audio right away.
STEP 4. Once the recording is over, you are able to get the recorded MiniDV video saved don desktop right away.
How Long Do MiniDV Tapes Last?
Conclusion
If you are thinking of transferring your MiniDV/DV to DVD, then the above content is a great benefit for you. In this article, we have showed you how to convert MiniDV to DVD effortlessly with VideoByte DVD Creator and also a DVD recorder. Additionally, more tips and FAQs can well guide you to get a high-quality DVD disc. You should note that it is important to ensure you have the right tool and take good care of your DVDs so that you are able to enjoy them in the future.
Hot Articles