How to Burn AVCHD to DVD Without Losing Quality
- By Karen Nelson
- 26/06/2023

DVD Creator
Q: I filmed a holiday video in AVCHD with a Sony camera but found it's not playable on the DVD player on TV. Does anyone know how to burn AVCHD videos to DVD without losing quality?
A: Sure. I believe most new Sony users will encounter this problem as well. Based on this situation, there are many solutions available in the market to deal with this issue. The most effective and reliable one is to use third-party software to burn AVCHD videos to DVD for easy transfer to larger screen devices like TV for better viewing, such as AVCHD to DVD converter.
What Is AVCHD DVD?
- AVCHD (Advanced Video Coding High Definition) was introduced in 2006 by Sony and Panasonic, well compatible with both standard definition (AVCHD-SD) and high definition (AVCHD 1080i) interlaced video. Not only that, its high compatibility allows AVCHD videos to be stored on various devices and players, including Blu-ray discs, USB, computer hard drives, and so on.
- DVD (Digital Video Disc), invented and developed in 1995, is a digital optical disc data storage format. Moreover, it offers higher storage capacity than compact discs. Users basically can store up to 4.7GB in a standard DVD and there are many variants that are capable of storing more than 10+GB.
When you find there are so many AVCHD videos in your camcorder, you may wonder how to convert ACHCD videos to DVD so you can back up these videos for further playback. All you need is a powerful AVCHD to DVD converter to help you on Windows/Mac.
Convert AVCHD to DVD: What You Need
Before burning an AVCHD video to a DVD, you need to prepare the following things.
- AVCHD (Advanced Video Coding High Definition) was introduced in 2006 by Sony and Panasonic, well compatible with both standard definition (AVCHD-SD) and high definition (AVCHD 1080i) interlaced video. Not only that, its high compatibility allows AVCHD videos to be stored on various devices and players, including Blu-ray discs, USB, computer hard drives, and so on.
- DVD (Digital Video Disc), invented and developed in 1995, is a digital optical disc data storage format. Moreover, it offers higher storage capacity than compact discs. Users basically can store up to 4.7GB in a standard DVD and there are many variants that are capable of storing more than 10+GB.
When you find there are so many AVCHD videos in your camcorder, you may wonder how to convert ACHCD videos to DVD so you can back up these videos for further playback. All you need is a powerful AVCHD to DVD converter to help you on Windows/Mac.
- Powerful but easy-to-use AVCHD to DVD Converter. For example, VideoByte DVD Creator exactly hits your needs, allowing you to easily burn your homemade AVCHD videos to a standard DVD for playback on any DVD player.
- USB cable/ Fire-wire /HDMI. To begin with, please upload your created AVCHD videos to the computer instead of keeping them in your Sony camera.
- Windows Computer/Mac Computer. The whole AVCHD to DVD conversion will be operated on Windows/Mac computers.
- Blank DVD disc. To make sure your DVD disc is usable, it is commended to use a blank and recordable DVD disc that has enough storage for saving your AVCHD videos.
How to Burn AVCHD to DVD Without Losing Quality
VideoByte DVD Creator can be your best AVCHD to DVD converter for Windows and Mac computers. Because this best DVD Creator software can burn almost all popular video formats including AHCVD, AVI, MP4, etc. to DVD disc/folder/ISO files without losing quality. Then, with it, you can easily burn MP4 to DVD or burn ISO files to DVD, and so forth.
Moreover, it also provides DVD menu-creating services for you to customize personal DVD menus with various DVD menu templates under different themes. Therefore, it's not just an AVCHD to DVD burner, but a powerful any video to DVD converter.
Here are the key features of VideoByte DVD Creator:
- It is able to easily burn AVCHD videos to DVDs and Blu-ray discs/folders/ISO.
- It helps you to create DVD menus, edit chapters and preview your DVD project before conversion so you can make your own perfect DVD.
- A video editor is offered to adjust video brightness, hue, saturation, and contrast.
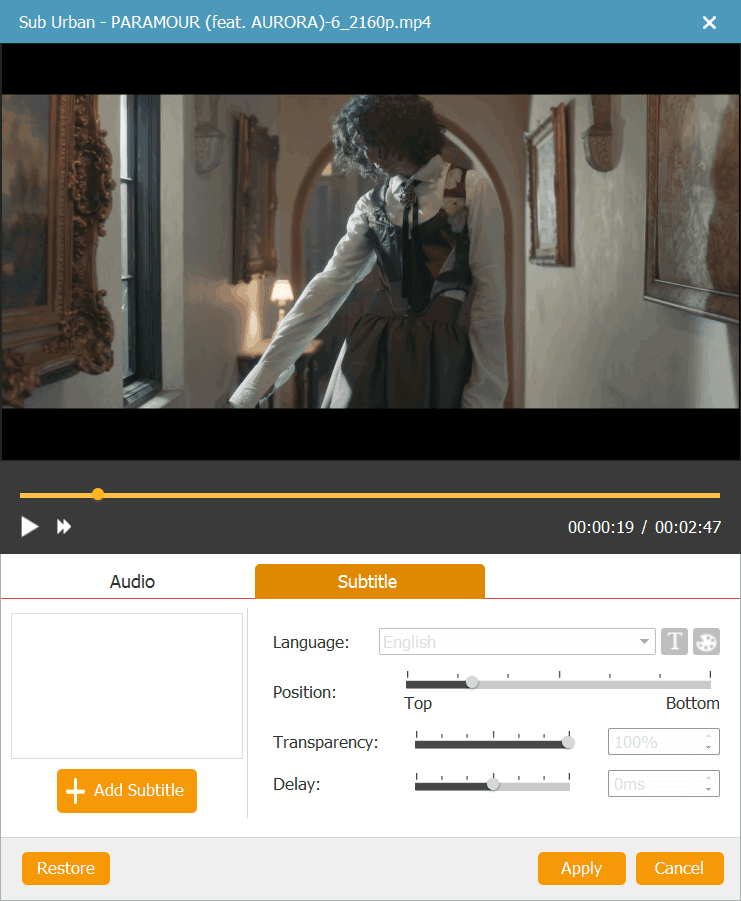
- You can add subtitles to perfect the AVCHD video before burning.
If you are looking for an AVCHD to DVD burner like VideoByte DVD Creator, please click the download button below to download and install the software on your computer. Then, follow the tutorial below to start converting AVCHD videos to DVDs without losing quality step by step.
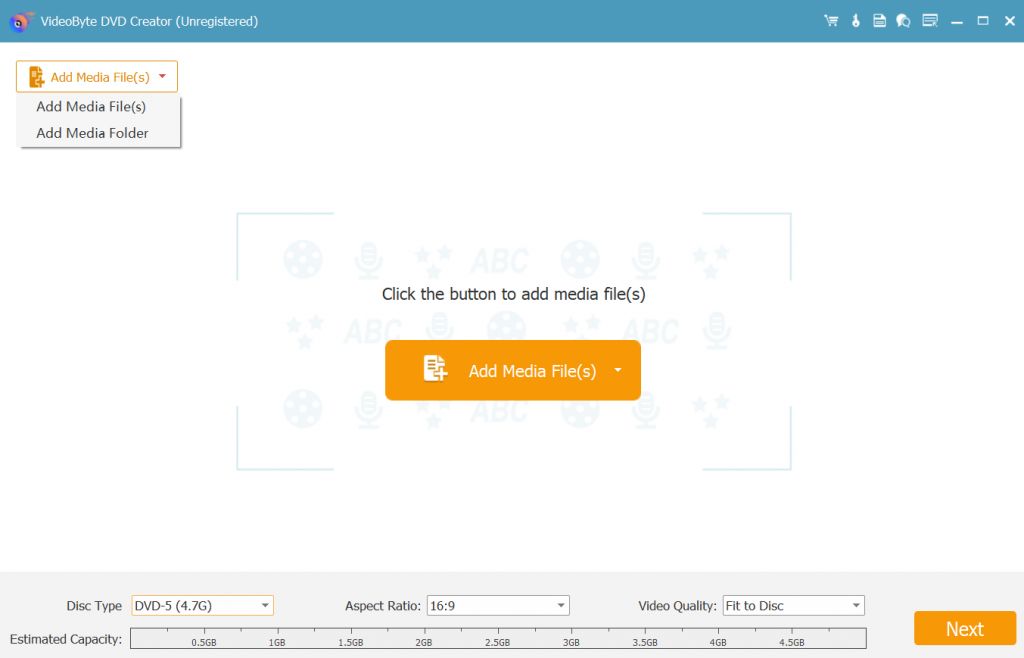
Step 1. Launch VideoByte DVD Creator
Step 2. Transfer AVCHD Video to Computer and Import It
Use a USB cable/ Fire-wire /HDMI to transfer AVCHD videos to your computer, and then go back to VideoByte DVD Creator. Then, directly drag and drop AVCHD videos or click the "Add Media Files" button to import AVCHD videos into the program.
Step 3. Edit AVCHD Video
Then, you are free to add some special effects to videos, find a "Magic Stick" icon at the right side of each video, then click on it to edit the video including rotating, cropping, trimming, adjusting the brightness, adding filter, and watermark.
If you aren't satisfied with the edited video, you can click the "Restore" icon on the bottom to re-edit. After finishing editing, click "Apply" at the bottom.
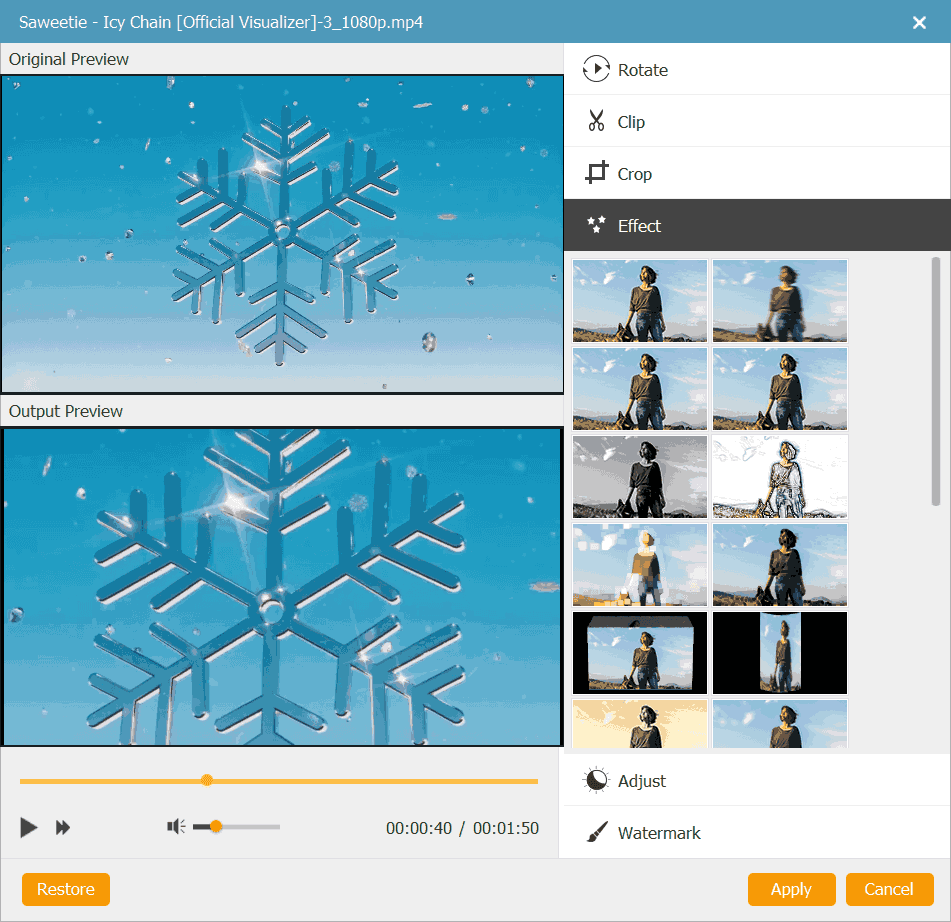
Besides, you are also free to change the basic parameters of the video DVD such as Disc type, aspect ratio, and video quality by selecting the parameters at the bottom of the main interface. Moreover, you can click the "Subtitles" option next to "Magic Stick" to add and enter subtitles.
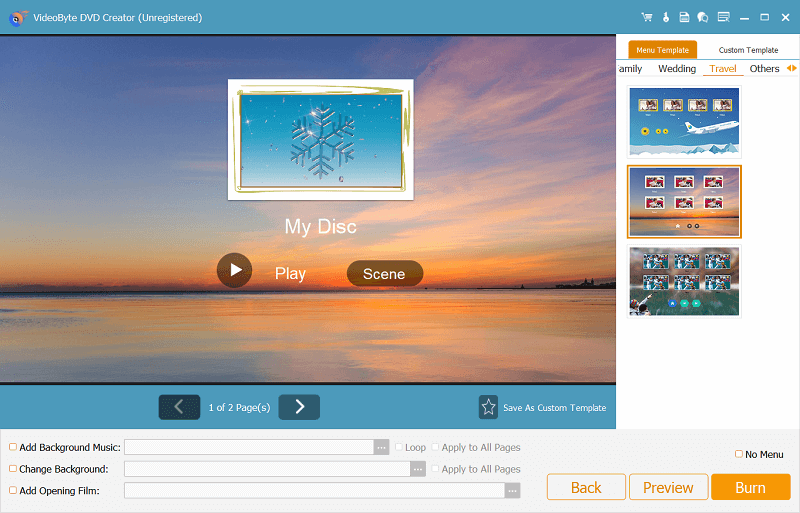
Step 4. Customize DVD Menu for AVCHD Videos
Press the "Next" icon at the bottom right corner to edit your DVD menu. On the left side, you can see menu templates in various styles such as holiday, wedding, family, travel, and so on. Just select one for your DVD menu.
Also, you can change the title subject as you like. In addition, you can add background music & opening film to your video and change the background at the bottom.
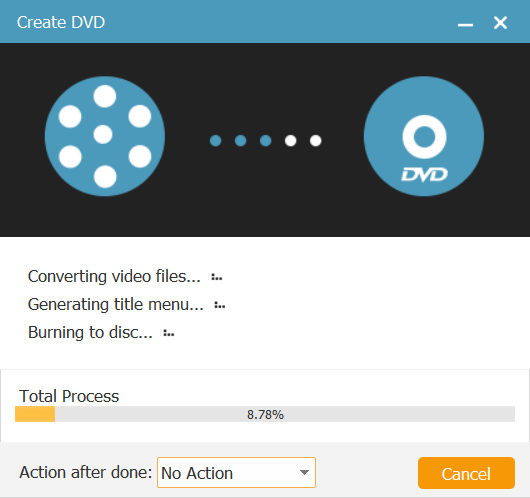
Step 5. Start to Convert AVCHD Video to DVD
Insert a blank DVD disc into DVD-ROM before starting burning, then click on the "Next" icon at the bottom right corner. Then, you can save the output folder to a DVD or DVD ISO file.
Besides, you can set the TV standard and playback mode as you like. When all of these are settled, you can click "Start" in the lower right corner to burn AVCHD video to DVD without quality loss.
FAQs About Converting AVCHD to DVD
Why Can't I Play AVCHD Video on Regular DVD?
Although the advantage of AVCHD video is outstanding - high video quality, its disadvantage is also hard to ignore - incompatible with DVD player. Moreover, there is a risk that the DVD player will not be able to eject the DVD, and possibly erase its contents without warning.
To avoid this risk, AVCHD should be played on a compatible Blu-ray Disc player or other compatible devices.
AVCHD can be played on the following types of products:
- Using a PC compatible with AVCHD software
- Blu-ray disc player with AVCHD-supporting technology
- PlayStation®3 (PS3™) consoles
What Formats Converted from AVCHD Can DVD Player Play?
DVD Player Supported Formats | |
Most Common DVD Player Format | H.222/H.262/MPEG-2 |
Other DVD Player Formats | Video Playback: MPEG-1; DivX; DVD+R/-R; MOV, WMV, WMA, etc; Audio Playback: CD, MP3, CD-R/RW, Audio CD, etc. |
Latest DVD Formats | H.264/MPEG-4 standard/Blu-Ray |
Conclusion
Now, you may have a general idea of how to convert AVCHD to DVD on Windows/Mac. Go through the detailed steps, you can easily start your first try to burn an AVCHD video to a DVD disc in a short time even if you are totally a novice as long as you have VideoByte DVD Creator. Why not give it a shot and start trying?
Hot Articles